大数据学习
bigdata learning
Toggle navigation
大数据学习
主页
openGauss数据库
Flume
MongoDB
Hadoop
数据库实验
Kafka
Zookeeper
Hbase
Manual
Spark
Neo4j
InfluxDB
RabbitMQ
Flink
About Me
归档
标签
06 openGauss数据库维护管理指导手册
openGauss数据库
2022-10-15 14:40:16
19
0
0
bigdata
openGauss数据库
# **1 操作系统参数检查** ## 1.1 实验介绍 ### 1.1.1 关于本实验 gs_checkos工具用来帮助检查操作系统、控制参数、磁盘配置等内容,并对系统控制参数、I/O配置、网络配置和THP服务等信息进行配置。 本实验主要是通过gs_checkos工具来检查操作系统参数设置是否合理。先进行场景设置,然后根据检查结果进行参数调整。 ### 1.1.2 实验目的 * 掌握gs_checkos工具的基本使用; ## 1.2 场景设置及操作步骤 **步骤 1** 用ROOT用户登录装有openGauss数据库服务的操作系统,登录后信息如下: > Welcome to 4.19.90-2003.4.0.0036.oe1.aarch64 > > System information as of time: Mon Jul 20 16:41:11 CST 2020 > > System load: 0.00 > > Processes: 113 > > Memory used: 7.0% > > Swap used: 0.0% > > Usage On: 15% > > IP address: 192.168.0.96 > > Users online: 2 > > [root@ecs-e1b3 ~]# **步骤 2** 在ROOT用户下执行gs_checkos先对系统参数进行检查。 > [root@ecs-e1b3 ~]# **gs_checkos -i A** > > Checking items: > > A1. [ OS version status ] : Normal > > A2. [ Kernel version status ] : Normal > > A3. [ Unicode status ] : Normal > > A4. [ Time zone status ] : Normal > > A5. [ Swap memory status ] : Normal > > A6. [ System control parameters status ] : Warning > > A7. [ File system configuration status ] : Normal > > A8. [ Disk configuration status ] : Normal > > A9. [ Pre-read block size status ] : Normal > > A10.[ IO scheduler status ] : Normal > > BondMode Null > > A11.[ Network card configuration status ] : Warning > > A12.[ Time consistency status ] : Warning > > A13.[ Firewall service status ] : Normal > > A14.[ THP service status ] : Normal > > Total numbers:14. Abnormal numbers:0. Warning numbers:3. 说明事项: Normal 为正常项,Abnormal为必须处理项,Warning可以不处理。 Total numbers:14. Abnormal numbers:0. Warning numbers:3。 表示:总共检查14项,其中Abnormal必须处理项为0,Warning告警项为3。 **步骤 3** 调整系统参数值。 在参数配置文件(/etc/sysctl.conf)中将参数 vm.min_free_kbytes(表示:内核内存分配保留的内存量) 的值调整为3488。**输入“i”进入INSERT模式,进行修改。** > [root@ecs-e1b3 ~]# **vi /etc/sysctl.conf** > > net.ipv4.conf.default.accept_redirects=0 > > net.ipv4.conf.all.secure_redirects=0 > > net.ipv4.conf.default.secure_redirects=0 > > net.ipv4.icmp_echo_ignore_broadcasts=1 > > net.ipv4.icmp_ignore_bogus_error_responses=1 > > ………...... > > net.ipv4.tcp_rmem = 8192 250000 16777216 > > net.ipv4.tcp_wmem = 8192 250000 16777216 > > **vm.min_free_kbytes = 3488** > > net.core.netdev_max_backlog = 65535 > > net.ipv4.tcp_max_syn_backlog = 65535 > > net.core.somaxconn = 65535 参数值修改好后,按” **ESC**”键退出编辑模式,然后输入” **:wq**”后回车进行保存。接着通过执行sysctl -p 命令使刚才修改的参数生效,具体如下: > [root@ecs-e1b3 ~]# **sysctl -p** > > kernel.sysrq = 0 > > net.ipv4.ip_forward = 0 > > net.ipv4.conf.all.send_redirects = 0 > > net.ipv4.conf.default.send_redirects = 0 > > net.ipv4.conf.all.accept_source_route = 0 > > net.ipv4.conf.default.accept_source_route = 0 > > net.ipv4.conf.all.accept_redirects = 0 > > net.ipv4.conf.default.accept_redirects = 0 > > ………….. > > net.core.rmem_default = 21299200 > > net.sctp.sctp_mem = 94500000 915000000 927000000 > > net.sctp.sctp_rmem = 8192 250000 16777216 > > net.sctp.sctp_wmem = 8192 250000 16777216 > > kernel.sem = 250 6400000 1000 25600 > > net.ipv4.tcp_rmem = 8192 250000 16777216 > > net.ipv4.tcp_wmem = 8192 250000 16777216 > > vm.min_free_kbytes = 3488 > > net.core.netdev_max_backlog = 65535 > > net.ipv4.tcp_max_syn_backlog = 65535 > > net.core.somaxconn = 65535 > > kernel.shmall = 1152921504606846720 > > kernel.shmmax = 18446744073709551615 **步骤 4** 再执行gs_checkos 对系统参数进行检查。 > [root@ecs-e1b3 ~]# **gs_checkos -i A** > > Checking items: > > A1. [ OS version status ] : Normal > > A2. [ Kernel version status ] : Normal > > A3. [ Unicode status ] : Normal > > A4. [ Time zone status ] : Normal > > A5. [ Swap memory status ] : Normal > > A6. [ System control parameters status ] : Abnormal > > A7. [ File system configuration status ] : Normal > > A8. [ Disk configuration status ] : Normal > > A9. [ Pre-read block size status ] : Normal > > A10.[ IO scheduler status ] : Normal > > BondMode Null > > A11.[ Network card configuration status ] : Warning > > A12.[ Time consistency status ] : Warning > > A13.[ Firewall service status ] : Normal > > A14.[ THP service status ] : Normal > > Total numbers:14. Abnormal numbers:1. Warning numbers:2. > > Do checking operation finished. Result: Abnormal. 此时A6. [ System control parameters status ] 的状态为Abnormal为必须处理项; > Total numbers:14. Abnormal numbers:1. Warning numbers:2。 表示:总共检查14项,其中Abnormal必须处理项为1,Warning告警项为2。 **步骤 5** 通过执行gs_checkos -i A --detail 查看更详细的信息。 > [root@ecs-e1b3 ~]# **gs_checkos -i A --detail** > > Checking items: > > A1. [ OS version status ] : Normal > > [ecs-e1b3] > > openEuler_20.03_64bit > > A2. [ Kernel version status ] : Normal > > The names about all kernel versions are same. The value is "4.19.90-2003.4.0.0036.oe1.aarch64". > > A3. [ Unicode status ] : Normal > > The values of all unicode are same. The value is "LANG=en_US.UTF-8". > > A4. [ Time zone status ] : Normal > > The informations about all timezones are same. The value is "+0800". > > A5. [ Swap memory status ] : Normal > > The value about swap memory is correct. > > **A6. [ System control parameters status ] : Abnormal** > > [ecs-e1b3] > > **Abnormal reason: variable 'vm.min_free_kbytes' RealValue '3488' ExpectedValue '348844'.** > > **Warning reason: variable 'net.ipv4.tcp_retries1' RealValue '3' ExpectedValue '5'.** > > **Warning reason: variable 'net.ipv4.tcp_syn_retries' RealValue '6' ExpectedValue '5'.** > > **Warning reason: variable 'net.sctp.path_max_retrans' RealValue '5' ExpectedValue '10'.** > > **Warning reason: variable 'net.sctp.max_init_retransmits' RealValue '8' ExpectedValue '10'.** > > Check_SysCtl_Parameter failed. > > A7. [ File system configuration status ] : Normal > > Both soft nofile and hard nofile are correct. > > A8. [ Disk configuration status ] : Normal > > The value about XFS mount parameters is correct. > > A9. [ Pre-read block size status ] : Normal > > The value about Logical block size is correct. > > A10.[ IO scheduler status ] : Normal > > The value of IO scheduler is correct. > > BondMode Null > > A11.[ Network card configuration status ] : Warning > > [ecs-e1b3] > > BondMode Null > > Warning reason: Failed to obtain the network card speed value. Maybe the network card "eth0" is not working. > > A12.[ Time consistency status ] : Warning > > [ecs-e1b3] > > The NTPD not detected on machine and local time is "2020-07-20 17:16:41". > > A13.[ Firewall service status ] : Normal > > The firewall service is stopped. > > A14.[ THP service status ] : Normal > > The THP service is stopped. > > Total numbers:14. Abnormal numbers:1. Warning numbers:2. > > Do checking operation finished. Result: Abnormal. 在详细信息中,可以明确看出那些参数设置有问题,并给出了问题参数要求修改的参考值,如下: > **A6. [ System control parameters status ] : Abnormal** > > **[ecs-e1b3]** > > **Abnormal reason: variable 'vm.min_free_kbytes' RealValue '3488' ExpectedValue '348844'.** > > **Warning reason: variable 'net.ipv4.tcp_retries1' RealValue '3' ExpectedValue '5'.** > > **Warning reason: variable 'net.ipv4.tcp_syn_retries' RealValue '6' ExpectedValue '5'.** > > **Warning reason: variable 'net.sctp.path_max_retrans' RealValue '5' ExpectedValue '10'.** > > **Warning reason: variable 'net.sctp.max_init_retransmits' RealValue '8' ExpectedValue '10'.** > > **Check_SysCtl_Parameter failed.** **步骤 6** 按详细信息中的修改说明对系统参数进行修改。 > vm.min_free_kbytes的值由3488调整为348844 > > net.ipv4.tcp_retries1的值由3调整为5. > > net.ipv4.tcp_syn_retries的值由6调整为5. > > net.sctp.path_max_retrans的值由5调整为10 > > net.sctp.max_init_retransmits的值由8调整为10 具体设置如下: > vm.min_free_kbytes = 348844 > > net.ipv4.tcp_retries1 = 5 > > net.ipv4.tcp_syn_retries = 5 > > net.sctp.path_max_retrans = 10 > > net.sctp.max_init_retransmits = 10 在系统参数文件中进行修改(输入“i”进入INSERT模式,进行修改。): > [root@ecs-e1b3 ~]# **vi /etc/sysctl.conf** > > \# sysctl settings are defined through files in > > \# /usr/lib/sysctl.d/, /run/sysctl.d/, and /etc/sysctl.d/. > > \# > > \# Vendors settings live in /usr/lib/sysctl.d/. > > \# To override a whole file, create a new file with the same in > > \# /etc/sysctl.d/ and put new settings there. To override > > \# only specific settings, add a file with a lexically later > > \# name in /etc/sysctl.d/ and put new settings there. > > \# > > \# For more information, see sysctl.conf(5) and sysctl.d(5). > > kernel.sysrq=0 > > net.ipv4.ip_forward=0 > > net.ipv4.conf.all.send_redirects=0 > > net.ipv4.conf.default.send_redirects=0 > > net.ipv4.conf.all.accept_source_route=0 > > net.ipv4.conf.default.accept_source_route=0 > > net.ipv4.conf.all.accept_redirects=0 > > \# /etc/sysctl.d/ and put new settings there. To override > > \# only specific settings, add a file with a lexically later > > \# name in /etc/sysctl.d/ and put new settings there. > > \# > > \# For more information, see sysctl.conf(5) and sysctl.d(5). > > kernel.sysrq=0 > > net.ipv4.ip_forward=0 > > net.ipv4.conf.all.send_redirects=0 > > net.ipv4.conf.default.send_redirects=0 > > net.ipv4.conf.all.accept_source_route=0 > > \# /etc/sysctl.d/ and put new settings there. To override > > \# only specific settings, add a file with a lexically later > > \# name in /etc/sysctl.d/ and put new settings there. > > \# > > \# For more information, see sysctl.conf(5) and sysctl.d(5). > > kernel.sysrq=0 > > net.ipv4.ip_forward=0 > > net.ipv4.conf.all.send_redirects=0 > > net.ipv4.conf.default.send_redirects=0 > > net.ipv4.conf.all.accept_source_route=0 > > net.ipv4.conf.default.accept_source_route=0 > > ………….. > > net.sctp.sctp_rmem = 8192 250000 16777216 > > net.sctp.sctp_wmem = 8192 250000 16777216 > > kernel.sem = 250 6400000 1000 25600 > > net.ipv4.tcp_rmem = 8192 250000 16777216 > > net.ipv4.tcp_wmem = 8192 250000 16777216 > > **vm.min_free_kbytes = 348844** > > net.core.netdev_max_backlog = 65535 > > net.ipv4.tcp_max_syn_backlog = 65535 > > net.core.somaxconn = 65535 > > kernel.shmall = 1152921504606846720 > > kernel.shmmax = 18446744073709551615 > > **net.ipv4.tcp_retries1 = 5** > > **net.ipv4.tcp_syn_retries = 5** > > **net.sctp.path_max_retrans = 10** > > **net.sctp.max_init_retransmits = 10** 参数值修改好后,按”ECS”键退出编辑模式,然后输入”:wq”后回车进行保存。接着通过执行sysctl -p 命令使刚才修改的参数生效,具体如下: > [root@ecs-e1b3 ~]# **sysctl -p** > > kernel.sysrq = 0 > > net.ipv4.ip_forward = 0 > > net.ipv4.conf.all.send_redirects = 0 > > net.ipv4.conf.default.send_redirects = 0 > > net.ipv4.conf.all.accept_source_route = 0 > > net.ipv4.conf.default.accept_source_route = 0 > > net.ipv4.conf.all.accept_redirects = 0 > > net.ipv4.conf.default.accept_redirects = 0 > > net.ipv4.conf.all.secure_redirects = 0 > > net.ipv4.conf.default.secure_redirects = 0 > > net.ipv4.icmp_echo_ignore_broadcasts = 1 > > net.ipv4.icmp_ignore_bogus_error_responses = 1 > > net.ipv4.conf.all.rp_filter = 1 > > net.ipv4.conf.default.rp_filter = 1 > > net.ipv4.tcp_syncookies = 1 > > kernel.dmesg_restrict = 1 > > net.ipv6.conf.all.accept_redirects = 0 > > net.ipv6.conf.default.accept_redirects = 0 > > vm.swappiness = 0 > > net.ipv4.tcp_max_tw_buckets = 10000 > > net.ipv4.tcp_tw_reuse = 1 > > ……………. > > net.ipv4.tcp_rmem = 8192 250000 16777216 > > net.ipv4.tcp_wmem = 8192 250000 16777216 > > vm.min_free_kbytes = 348844 > > net.core.netdev_max_backlog = 65535 > > net.ipv4.tcp_max_syn_backlog = 65535 > > net.core.somaxconn = 65535 > > kernel.shmall = 1152921504606846720 > > kernel.shmmax = 18446744073709551615 > > net.ipv4.tcp_retries1 = 5 > > net.ipv4.tcp_syn_retries = 5 > > net.sctp.path_max_retrans = 10 > > net.sctp.max_init_retransmits = 10 **步骤 7** 再次通过执行gs_checkos -i A 查看系统参数检查是否能通过。 > [root@ecs-e1b3 ~]# **gs_checkos -i A** > > Checking items: > > A1. [ OS version status ] : Normal > > A2. [ Kernel version status ] : Normal > > A3. [ Unicode status ] : Normal > > A4. [ Time zone status ] : Normal > > A5. [ Swap memory status ] : Normal > > A6. [ System control parameters status ] : Normal > > A7. [ File system configuration status ] : Normal > > A8. [ Disk configuration status ] : Normal > > A9. [ Pre-read block size status ] : Normal > > A10.[ IO scheduler status ] : Normal > > BondMode Null > > A11.[ Network card configuration status ] : Warning > > A12.[ Time consistency status ] : Warning > > A13.[ Firewall service status ] : Normal > > A14.[ THP service status ] : Normal > > Total numbers:14. Abnormal numbers:0. Warning numbers:2. 从检查结果可以看出,系统参数检查已经通过。其中A6. [ System control parameters status ]的状态由原来的Abnormal变为了Normal。 操作系统参数检查实验结束。 # **2** openGauss运行健康状态检查 ## 2.1 实验介绍 ### 2.1.1 关于本实验 gs_check能够帮助用户在openGauss运行过程中,全量的检查openGauss运行环境,操作系统环境,网络环境及数据库执行环境,也有助于在openGauss重大操作之前对各类环境进行全面检查,有效保证操作执行成功。 本实验主要是通过gs_check工具来检查openGauss数据库运行状态。先进行场景设置,然后根据检查结果进行数据库调整。 语法如下: 单项检查: > gs_check -i ITEM [...] [-U USER] [-L] [-l LOGFILE] [-o OUTPUTDIR] [--skip-root-items][--set][--routing] 场景检查: > gs_check -e SCENE_NAME [-U USER] [-L] [-l LOGFILE] [-o OUTPUTDIR] [--hosts] [--skip-root-items] [--time-out=SECS][--set][--routing][--skip-items] 场景检查项。默认的场景有inspect(例行巡检)、upgrade(升级前巡检)、binary_upgrade(就地升级前巡检)、health(健康检查巡检)、install(安装),等,用户可以根据需求自己编写场景。 显示帮助信息。 > gs_check -? | --help ### 2.1.2 实验目的 * 掌握gs_check工具的基本使用; ## 2.2 场景设置及操作步骤 **步骤 1** 用ROOT用户登录装有openGauss数据库服务的操作系统然后用 su – omm命令切换至OMM用户环境,登录后信息如下。 > Welcome to 4.19.90-2003.4.0.0036.oe1.aarch64 > > System information as of time: Tue Jul 21 09:21:11 CST 2020 > > System load: 0.01 > > Processes: 109 > > Memory used: 6.7% > > Swap used: 0.0% > > Usage On: 15% > > IP address: 192.168.0.96 > > Users online: 1 > > [root@ecs-e1b3 ~]# **su - omm** > > Last login: Fri Jul 10 19:05:39 CST 2020 on pts/0 > > Welcome to 4.19.90-2003.4.0.0036.oe1.aarch64 > > System information as of time: Tue Jul 21 09:21:25 CST 2020 > > System load: 0.01 > > Processes: 111 > > Memory used: 7.0% > > Swap used: 0.0% > > Usage On: 15% > > IP address: 192.168.0.96 > > Users online: 1 > > [omm@ecs-e1b3 ~]$ **步骤 2** 确认openGauss数据库服务是否启动。 > [omm@ecs-e1b3 ~]$ **gs_om -t status;** > > \---------------------------------------------------------------------- > > cluster_state : Normal > > redistributing : No > > \---------------------------------------------------------------------- cluster_state : Normal 表示已启动,可以正常使用。如果状态为非Normal表示不可用 为了实验场景设置,如果数据库服务已经启动,请执行步骤3先关闭服务。 **步骤 3** 关闭openGauss数据库服务。 > [omm@ecs-e1b3 ~]$ **gs_om -t stop;** > > Stopping cluster. > > ========================================= > > Successfully stopped cluster. > > ========================================= > > End stop cluster. **步骤 4** 检查openGauss实例连接。 > [omm@ecs-e1b3 ~]$ **gs_check -i CheckDBConnection** > > Parsing the check items config file successfully > > Distribute the context file to remote hosts successfully > > Start to health check for the cluster. Total Items:1 Nodes:1 > > Checking... [=========================] 1/1 > > Start to analysis the check result > > **CheckDBConnection...........................NG** > > The item run on 1 nodes. ng: 1 > > The ng[ecs-e1b3] value: > > **The database can not be connected.** > Analysis the check result successfully > > **Failed.** **All check items run completed. Total:1 NG:1** > > For more information please refer to /opt/huawei/wisequery/script/gspylib/inspection/output/CheckReport_2020072139449163171.tar.gz 说明: * CheckDBConnection...........................NG 表示连接检查项无用; * The database can not be connected. 表示实例不能连接; * Failed. All check items run completed. Total:1 NG:1 表示共检查1项并且检查结果未通过。 **步骤 5** 启动openGauss数据库服务。 > [omm@ecs-e1b3 ~]$ **gs_om -t start;** > > Starting cluster. > > ========================================= > > ========================================= > > Successfully started. > > [omm@ecs-e1b3 ~]$ **步骤 6** 确认openGauss数据库服务已启动。 > [omm@ecs-e1b3 ~]$ **gs_om -t status;** > > \---------------------------------------------------------------------- > > cluster_state : Normal > > redistributing : No > > \---------------------------------------------------------------------- > > [omm@ecs-e1b3 ~]$ **步骤 7** 再次检查openGauss实例连接。 > [omm@ecs-e1b3 ~]$ **gs_check -i CheckDBConnection** > > Parsing the check items config file successfully > > Distribute the context file to remote hosts successfully > > Start to health check for the cluster. Total Items:1 Nodes:1 > > Checking... [=========================] 1/1 > > Start to analysis the check result > > **CheckDBConnection...........................OK** > > The item run on 1 nodes. success: 1 > Analysis the check result successfully > > Success. All check items run completed. Total:1 Success:1 > > For more information please refer to /opt/huawei/wisequery/script/gspylib/inspection/output/CheckReport_2020072140672174672.tar.gz 说明: * CheckDBConnection...........................OK 表示连接检查项正常; * Success. All check items run completed. Total:1 Success:1 表示共检查1项并且检查结果成功。 * openGauss数据库运行健康状态检查实验结束。 # **3** 数据库性能检查 ## 3.1 实验介绍 ### 3.1.1 关于本实验 openGauss 不仅提供了gs_checkperf工具来帮助用户了解openGauss的负载情况。 本实验主要是通过gs_checkperf工具来检查openGauss数据库性能以及通过EXPLAIN来进行SQL语句优化。 ### 3.1.2 实验目的 * 掌握gs_checkperf工具的基本使用; ## 3.2 通过gs_checkperf工具来检查数据库性能 说明: gs_checkperf可以对以下级别进行检查: * openGauss级别(主机CPU占用率、Gauss CPU占用率、I/O使用情况等)、 * 节点级别(CPU使用情况、内存使用情况、I/O使用情况)、 * 会话/进程级别(CPU使用情况、内存使用情况、I/O使用情况)、 * SSD性能(写入、读取性能) 其中检查SSD性能要用root用户执行,检查openGauss性能要用openGauss安装用户执行 本实验为检查openGauss性能。 **步骤 1** 用ROOT用户登录装有openGauss数据库服务的操作系统然后用 su – omm命令切换至OMM用户环境,登录后信息如下。 > Welcome to 4.19.90-2003.4.0.0036.oe1.aarch64 > > System information as of time: Tue Jul 21 09:21:11 CST 2020 > > System load: 0.01 > > Processes: 109 > > Memory used: 6.7% > > Swap used: 0.0% > > Usage On: 15% > > IP address: 192.168.0.96 > > Users online: 1 > > [root@ecs-e1b3 ~]# **su - omm** > > Last login: Fri Jul 10 19:05:39 CST 2020 on pts/0 > > Welcome to 4.19.90-2003.4.0.0036.oe1.aarch64 > > System information as of time: Tue Jul 21 09:21:25 CST 2020 > > System load: 0.01 > > Processes: 111 > > Memory used: 7.0% > > Swap used: 0.0% > > Usage On: 15% > > IP address: 192.168.0.96 > > Users online: 1 > > [omm@ecs-e1b3 ~]$ **步骤 2** 先启动数据库服务,再用gs_checkperf检查下,再使用gsql客户端以管理员用户身份连接postgres数据库,假设端口号为26000。 先启动数据库服务。 > [omm@ecs-e1b3 ~]$ **gs_om -t start;** > > Starting cluster. > > ========================================= > > ========================================= > > Successfully started. 用gs_checkperf检查下。 > [omm@ecs-e1b3 ~]$ **gs_checkperf** > > Cluster statistics information: > > Host CPU busy time ratio : .72 % > > MPPDB CPU time % in busy time : .33 % > > Shared Buffer Hit ratio : 97.33 % > > In-memory sort ratio : 0 > > Physical Reads : 466 > > Physical Writes : 175 > > DB size : 47 MB > > Total Physical writes : 175 > > Active SQL count : 3 > > Session count : 4 确认openGauss数据库服务是否正常。 > [omm@ecs-e1b3 ~]$ **gs_om -t status;** > > \---------------------------------------------------------------------- > > cluster_state : Unavailable > > redistributing : No > > \---------------------------------------------------------------------- cluster_state : Normal 表示已启动,可以正常使用。如果状态为Unavailable表示不可用 为了实验继续进行,请先启动数据库服务。 启动数据库服务(如果数据库服务是正常的,此步骤可以不执行)。 > [omm@ecs-e1b3 ~]$ **gs_om -t start;** > > Starting cluster. > > ========================================= > > ========================================= > > Successfully started. 然后连接postgres数据库。 > [omm@ecs-e1b3 ~]$ **gsql -d postgres -p 26000 -r** > > gsql ((openGauss 1.1.0 build 38a9312a) compiled at 2020-05-27 14:57:08 commit 472 last mr 549 ) > > Non-SSL connection (SSL connection is recommended when requiring high-security) > > Type "help" for help. > postgres=# **步骤 3** 对PMK模式下的表进行统计信息收集。 > postgres=# **analyze pmk.pmk_configuration;** > > ANALYZE > > postgres=# **analyze pmk.pmk_meta_data;** > > ANALYZE > > postgres=# **analyze pmk.pmk_snapshot;** > > ANALYZE > > postgres=# **analyze pmk.pmk_snapshot_datanode_stat;** > > ANALYZE > > postgres=# 说明: * gs_checkperf工具的监控信息依赖于pmk模式下的表的数据,如果pmk模式下的表未执行analyze操作,则可能导致gs_checkperf工具执行失败。 **步骤 4** 执行简要性能检查。 用 \q 先退出postgres数据库,然后在操作系统用户 omm 环境下去执行gs_checkperf检查工具,具体如下: > postgres=# > > postgres=# **\q** > > [omm@ecs-e1b3 ~]$ **gs_checkperf** > > Cluster statistics information: > > Host CPU busy time ratio : 1.66 % -----主机CPU占用率 > > MPPDB CPU time % in busy time : 2.51 % ----Gauss CPU占用率 > > Shared Buffer Hit ratio : 99.14 % ----共享内存命中率 > > In-memory sort ratio : 0 ---内存中排序比率 > > Physical Reads : 504 ---物理读次数 > > Physical Writes : 162 ---物理写次数 > > DB size : 57 MB ---DB大小 > > Total Physical writes : 162 ---总物理写次数 > > Active SQL count : 4 ---当前SQL执行数 > > Session count : 5 ---Session数量 **步骤 5** 执行详细性能检查。 > [omm@ecs-e1b3 ~]$ **gs_checkperf --detail** > > Cluster statistics information: > > Host CPU usage rate: > > Host total CPU time : 45719980.000 Jiffies > > Host CPU busy time : 761060.000 Jiffies > > Host CPU iowait time : 6640.000 Jiffies > > Host CPU busy time ratio : 1.66 % > > Host CPU iowait time ratio : .01 % > > MPPDB CPU usage rate: > > MPPDB CPU time % in busy time : 5.12 % > > MPPDB CPU time % in total time : .09 % > > Shared buffer hit rate: > > Shared Buffer Reads : 1057 > > Shared Buffer Hits : 139798 > > Shared Buffer Hit ratio : 99.25 % > > In memory sort rate: > > In-memory sort count : 0 > > In-disk sort count : 0 > > In-memory sort ratio : 0 > > I/O usage: > > Number of files : 106 > > Physical Reads : 584 > > Physical Writes : 362 > > Read Time : 5794 ms > > Write Time : 4046 ms > > Disk usage: > > DB size : 57 MB > > Total Physical writes : 362 > > Average Physical write : 89471.08 > > Maximum Physical write : 362 > > Activity statistics: > > Active SQL count : 4 > > Session count : 5 > > Node statistics information: > > dn_6001: > > MPPDB CPU Time : 38960 Jiffies > > Host CPU Busy Time : 761060 Jiffies > > Host CPU Total Time : 45719980 Jiffies > > MPPDB CPU Time % in Busy Time : 5.12 % > > MPPDB CPU Time % in Total Time : .09 % > > Physical memory : 7144341504 Bytes > > DB Memory usage : 14922285056 Bytes > > Shared buffer size : 1073741824 Bytes > > Shared buffer hit ratio : 99.25 % > > Sorts in memory : 0 > > Sorts in disk : 0 > > In-memory sort ratio : 0 > > Number of files : 106 > > Physical Reads : 584 > > Physical Writes : 362 > > Read Time : 5794 > > Write Time : 4046 > > Session statistics information(Top 10): > > Session CPU statistics: > > 1 dn_6001-postgres-omm: > > Session CPU time : 2 > > Database CPU time : 39020 > > Session CPU time % : .01 % > > …………… > > Session Memory statistics: > > 1 dn_6001-postgres-omm: > > Buffer Reads : 1309 > > Shared Buffer Hit ratio : 93.03 > > In Memory sorts : 0 > > In Disk sorts : 0 > > In Memory sorts ratio : 0 > > Total Memory Size : 7433136 > > Used Memory Size : 6443268 > > ……………….. > > Session IO statistics: > > 1 dn_6001-postgres-omm: > > Physical Reads : 98 > > Read Time : 1069 > > 2 dn_6001-postgres-omm: > > Physical Reads : 13 > > Read Time : 173 > > ………......... > > [omm@ecs-e1b3 ~]$ gs_checkperf 检查实验结束。 ## 3.3 通过EXPLAIN进行SQL语句优化 说明: * 使用explain能显示SQL语句的执行计划; * 执行计划将显示SQL语句所引用的表会采用什么样的扫描方式,如:简单的顺序扫描、索引扫描等。如果引用了多个表,执行计划还会显示用到的JOIN算法; * 执行计划的最关键的部分是语句的预计执行开销,这是计划生成器估算执行该语句将花费多长的时间; * 若指定了ANALYZE选项,则该语句模拟执行并形成最优的执行计划(并非真正执行),然后根据实际的运行结果显示统计数据,包括每个计划节点内时间总开销(毫秒为单位)和实际返回的总行数。这对于判断计划生成器的估计是否接近现实非常有用。 **步骤 1** 用ROOT用户登录装有openGauss数据库服务的操作系统然后用 su – omm命令切换至OMM用户环境,登录后信息如下。 > Welcome to 4.19.90-2003.4.0.0036.oe1.aarch64 > > System information as of time: Tue Jul 21 09:21:11 CST 2020 > > System load: 0.01 > > Processes: 109 > > Memory used: 6.7% > > Swap used: 0.0% > > Usage On: 15% > > IP address: 192.168.0.96 > > Users online: 1 > > [root@ecs-e1b3 ~]# **su - omm** > > Last login: Fri Jul 10 19:05:39 CST 2020 on pts/0 > > Welcome to 4.19.90-2003.4.0.0036.oe1.aarch64 > > System information as of time: Tue Jul 21 09:21:25 CST 2020 > > System load: 0.01 > > Processes: 111 > > Memory used: 7.0% > > Swap used: 0.0% > > Usage On: 15% > > IP address: 192.168.0.96 > > Users online: 1 > > [omm@ecs-e1b3 ~]$ **步骤 2** 先启动数据库服务,然后使用gsql客户端以管理员用户身份连接postgres数据库,假设端口号为26000。 启动数据库服务。 > [omm@ecs-e1b3 ~]$ **gs_om -t start;** > > Starting cluster. > > ========================================= > > ========================================= > > Successfully started. 然后连接postgres数据库。 > [omm@ecs-e1b3 ~]$ **gsql -d postgres -p 26000 -r** > > gsql ((openGauss 1.1.0 build 38a9312a) compiled at 2020-05-27 14:56:08 commit 472 last mr 549 ) > > Non-SSL connection (SSL connection is recommended when requiring high-security) > > Type "help" for help. > > postgres=# **步骤 3** 创建student表。 > postgres=# **CREATE TABLE student** > > *( std_id INT NOT NULL,** > > **std_name VARCHAR(20) NOT NULL,** > > **std_sex VARCHAR(6),** > > **std_birth DATE,** > > **std_in DATE NOT NULL,** > > **std_address VARCHAR(100)** > > *);** > CREATE TABLE **步骤 4** 表数据插入。 > INSERT INTO student(std_id,std_name,std_sex,std_birth,std_in,std_address) VALUES (1,'张一','男','1993-01-01','2011-09-01','江苏省南京市雨花台区'); > > INSERT INTO student(std_id,std_name,std_sex,std_birth,std_in,std_address) VALUES (2,'张二','男','1993-01-02','2011-09-01','江苏省南京市雨花台区'); > > INSERT INTO student(std_id,std_name,std_sex,std_birth,std_in,std_address) VALUES (3,'张三','男','1993-01-03','2011-09-01','江苏省南京市雨花台区'); > > INSERT INTO student(std_id,std_name,std_sex,std_birth,std_in,std_address) VALUES (4,'张四','男','1993-01-04','2011-09-01','江苏省南京市雨花台区'); > > INSERT INTO student(std_id,std_name,std_sex,std_birth,std_in,std_address) VALUES (5,'张五','男','1993-01-05','2011-09-01','江苏省南京市雨花台区'); > > INSERT INTO student(std_id,std_name,std_sex,std_birth,std_in,std_address) VALUES (6,'张六','男','1993-01-06','2011-09-01','江苏省南京市雨花台区'); > > INSERT INTO student(std_id,std_name,std_sex,std_birth,std_in,std_address) VALUES (7,'张七','男','1993-01-07','2011-09-01','江苏省南京市雨花台区'); > > INSERT INTO student(std_id,std_name,std_sex,std_birth,std_in,std_address) VALUES (8,'张八','男','1993-01-08','2011-09-01','江苏省南京市雨花台区'); > > INSERT INTO student(std_id,std_name,std_sex,std_birth,std_in,std_address) VALUES (9,'张九','男','1993-01-09','2011-09-01','江苏省南京市雨花台区'); > > INSERT INTO student(std_id,std_name,std_sex,std_birth,std_in,std_address) VALUES (10,'李一','男','1993-01-10','2011-09-01','江苏省南京市雨花台区'); > > INSERT INTO student(std_id,std_name,std_sex,std_birth,std_in,std_address) VALUES (11,'李二','男','1993-01-11','2011-09-01','江苏省南京市雨花台区'); > > INSERT INTO student(std_id,std_name,std_sex,std_birth,std_in,std_address) VALUES (12,'李三','男','1993-01-12','2011-09-01','江苏省南京市雨花台区'); > > INSERT INTO student(std_id,std_name,std_sex,std_birth,std_in,std_address) VALUES (13,'李四','男','1993-01-13','2011-09-01','江苏省南京市雨花台区'); > > INSERT INTO student(std_id,std_name,std_sex,std_birth,std_in,std_address) VALUES (14,'李五','男','1993-01-14','2011-09-01','江苏省南京市雨花台区'); > > INSERT INTO student(std_id,std_name,std_sex,std_birth,std_in,std_address) VALUES (15,'李六','男','1993-01-15','2011-09-01','江苏省南京市雨花台区'); > > INSERT INTO student(std_id,std_name,std_sex,std_birth,std_in,std_address) VALUES (16,'李七','男','1993-01-16','2011-09-01','江苏省南京市雨花台区'); > > INSERT INTO student(std_id,std_name,std_sex,std_birth,std_in,std_address) VALUES (17,'李八','男','1993-01-17','2011-09-01','江苏省南京市雨花台区'); > > INSERT INTO student(std_id,std_name,std_sex,std_birth,std_in,std_address) VALUES (18,'李九','男','1993-01-18','2011-09-01','江苏省南京市雨花台区'); > > INSERT INTO student(std_id,std_name,std_sex,std_birth,std_in,std_address) VALUES (19,'王一','男','1993-01-19','2011-09-01','江苏省南京市雨花台区'); > > INSERT INTO student(std_id,std_name,std_sex,std_birth,std_in,std_address) VALUES (20,'王二','男','1993-01-20','2011-09-01','江苏省南京市雨花台区'); > > INSERT INTO student(std_id,std_name,std_sex,std_birth,std_in,std_address) VALUES (21,'王三','男','1993-01-21','2011-09-01','江苏省南京市雨花台区'); > > INSERT INTO student(std_id,std_name,std_sex,std_birth,std_in,std_address) VALUES (22,'王四','男','1993-01-22','2011-09-01','江苏省南京市雨花台区'); > > INSERT INTO student(std_id,std_name,std_sex,std_birth,std_in,std_address) VALUES (23,'王五','男','1993-01-23','2011-09-01','江苏省南京市雨花台区'); > > INSERT INTO student(std_id,std_name,std_sex,std_birth,std_in,std_address) VALUES (24,'王六','男','1993-01-24','2011-09-01','江苏省南京市雨花台区'); > > INSERT INTO student(std_id,std_name,std_sex,std_birth,std_in,std_address) VALUES (25,'王七','男','1993-01-25','2011-09-01','江苏省南京市雨花台区'); > > INSERT INTO student(std_id,std_name,std_sex,std_birth,std_in,std_address) VALUES (26,'王八','男','1993-01-26','2011-09-01','江苏省南京市雨花台区'); > > INSERT INTO student(std_id,std_name,std_sex,std_birth,std_in,std_address) VALUES (27,'王九','男','1993-01-27','2011-09-01','江苏省南京市雨花台区'); > > INSERT INTO student(std_id,std_name,std_sex,std_birth,std_in,std_address) VALUES (28,'钱一','男','1993-01-28','2011-09-01','江苏省南京市雨花台区'); > > INSERT INTO student(std_id,std_name,std_sex,std_birth,std_in,std_address) VALUES (29,'钱二','男','1993-01-29','2011-09-01','江苏省南京市雨花台区'); > > INSERT INTO student(std_id,std_name,std_sex,std_birth,std_in,std_address) VALUES (30,'钱三','男','1993-01-30','2011-09-01','江苏省南京市雨花台区'); > > INSERT INTO student(std_id,std_name,std_sex,std_birth,std_in,std_address) VALUES (31,'钱四','男','1993-02-01','2011-09-01','江苏省南京市雨花台区'); > > INSERT INTO student(std_id,std_name,std_sex,std_birth,std_in,std_address) VALUES (32,'钱五','男','1993-02-02','2011-09-01','江苏省南京市雨花台区'); > > INSERT INTO student(std_id,std_name,std_sex,std_birth,std_in,std_address) VALUES (33,'钱六','男','1993-02-03','2011-09-01','江苏省南京市雨花台区'); > > INSERT INTO student(std_id,std_name,std_sex,std_birth,std_in,std_address) VALUES (34,'钱七','男','1993-02-04','2011-09-01','江苏省南京市雨花台区'); > > INSERT INTO student(std_id,std_name,std_sex,std_birth,std_in,std_address) VALUES (35,'钱八','男','1993-02-05','2011-09-01','江苏省南京市雨花台区'); > > INSERT INTO student(std_id,std_name,std_sex,std_birth,std_in,std_address) VALUES (36,'钱九','男','1993-02-06','2011-09-01','江苏省南京市雨花台区'); > > INSERT INTO student(std_id,std_name,std_sex,std_birth,std_in,std_address) VALUES (37,'吴一','男','1993-02-07','2011-09-01','江苏省南京市雨花台区'); > > INSERT INTO student(std_id,std_name,std_sex,std_birth,std_in,std_address) VALUES (38,'吴二','男','1993-02-08','2011-09-01','江苏省南京市雨花台区'); > > INSERT INTO student(std_id,std_name,std_sex,std_birth,std_in,std_address) VALUES (39,'吴三','男','1993-02-09','2011-09-01','江苏省南京市雨花台区'); > > INSERT INTO student(std_id,std_name,std_sex,std_birth,std_in,std_address) VALUES (40,'吴四','男','1993-02-10','2011-09-01','江苏省南京市雨花台区'); > > INSERT INTO student(std_id,std_name,std_sex,std_birth,std_in,std_address) VALUES (41,'吴五','男','1993-02-11','2011-09-01','江苏省南京市雨花台区'); > > INSERT INTO student(std_id,std_name,std_sex,std_birth,std_in,std_address) VALUES (42,'吴六','男','1993-02-12','2011-09-01','江苏省南京市雨花台区'); > > INSERT INTO student(std_id,std_name,std_sex,std_birth,std_in,std_address) VALUES (43,'吴七','男','1993-02-13','2011-09-01','江苏省南京市雨花台区'); > > INSERT INTO student(std_id,std_name,std_sex,std_birth,std_in,std_address) VALUES (44,'吴八','男','1993-02-14','2011-09-01','江苏省南京市雨花台区'); > > INSERT INTO student(std_id,std_name,std_sex,std_birth,std_in,std_address) VALUES (45,'吴九','男','1993-02-15','2011-09-01','江苏省南京市雨花台区'); > > INSERT INTO student(std_id,std_name,std_sex,std_birth,std_in,std_address) VALUES (46,'柳一','男','1993-02-16','2011-09-01','江苏省南京市雨花台区'); > > INSERT INTO student(std_id,std_name,std_sex,std_birth,std_in,std_address) VALUES (47,'柳二','男','1993-02-17','2011-09-01','江苏省南京市雨花台区'); > > INSERT INTO student(std_id,std_name,std_sex,std_birth,std_in,std_address) VALUES (48,'柳三','男','1993-02-18','2011-09-01','江苏省南京市雨花台区'); > > INSERT INTO student(std_id,std_name,std_sex,std_birth,std_in,std_address) VALUES (49,'柳四','男','1993-02-19','2011-09-01','江苏省南京市雨花台区'); > > INSERT INTO student(std_id,std_name,std_sex,std_birth,std_in,std_address) VALUES (50,'柳五','男','1993-02-20','2011-09-01','江苏省南京市雨花台区'); **步骤 5** 数据查询统计。。 > postgres=# **select count(\*) from student;** > > count > > \------- > > 50 > > (1 row) > postgres=# **select \* from student order by std_id;** > > std_id | std_name | std_sex | std_birth | std_in | std_address > > --------+----------+---------+---------------------+---------------------+---------------------- > > 1 | 张一 | 男 | 1993-01-01 00:00:00 | 2011-09-01 00:00:00 | 江苏省南京市雨花台区 > > 2 | 张二 | 男 | 1993-01-02 00:00:00 | 2011-09-01 00:00:00 | 江苏省南京市雨花台区 > > 3 | 张三 | 男 | 1993-01-03 00:00:00 | 2011-09-01 00:00:00 | 江苏省南京市雨花台区 > > 4 | 张四 | 男 | 1993-01-04 00:00:00 | 2011-09-01 00:00:00 | 江苏省南京市雨花台区 > > …………….. **步骤 6** 查看表信息。 > postgres=# **\d student** > > Table "public.student" > > Column | Type | Modifiers > > -------------+--------------------------------+----------- > > std_id | integer | not null > > std_name | character varying(20) | not null > > std_sex | character varying(6) | > > std_birth | timestamp(0) without time zone | > > std_in | timestamp(0) without time zone | not null > > std_address | character varying(100) | **步骤 7** 收集表的统计信息。 > postgres=# **ANALYZE VERBOSE student;** > > INFO: analyzing "public.student"(dn_6001 pid=48036) > > INFO: ANALYZE INFO : "student": scanned 1 of 1 pages, containing 50 live rows and 0 dead rows; 50 rows in sample, 50 estimated total rows(dn_6001 pid=48036) > > ANALYZE 使用ANALYZE VERBOSE语句更新统计信息,会同时输出表的相关信息。 **步骤 8** 查看语句的执行计划。 > postgres=# **explain select \* from student where std_id=30;** > > QUERY PLAN > > \-------------------------------------------------------- > > Seq Scan on student (cost=0.00..1.62 rows=1 width=62) > > Filter: (std_id = 30) > > (2 rows) > > Seq Scan on student 表示使用的是全表扫描。 **步骤 9** 给表添加主键。 > postgres=# **alter table student add primary key (std_id);** > > NOTICE: ALTER TABLE / ADD PRIMARY KEY will create implicit index "student_pkey" for table "student" > > ALTER TABLE **步骤 10** 再次查看表信息。 确定主键是否建好。 > postgres=# **\d student** > > Table "public.student" > > Column | Type | Modifiers > > -------------+--------------------------------+----------- > > std_id | integer | not null > > std_name | character varying(20) | not null > > std_sex | character varying(6) | > > std_birth | timestamp(0) without time zone | > > std_in | timestamp(0) without time zone | not null > > std_address | character varying(100) | > > Indexes: > > **"student_pkey" PRIMARY KEY, btree (std_id) TABLESPACE pg_default** student_pkey 为主键名称。 **步骤 11** 通过hint来优化语句扫描方式。 通过加hint来使查询语句进行索引扫描。 > postgres=# **explain select /\*+indexscan(student student_pkey)\*/ \* from student where std_id=30;** > > QUERY PLAN ---------------------------------------------------------------------- > [Bypass] > > Index Scan using student_pkey on student (cost=0.00..8.27 rows=1 width=62) > > Index Cond: (std_id = 30) > > (3 rows) > postgres=# * Index Scan using student_pkey on student 表示语句通过student表上的主键索引student_pkey进行了索引扫描。 **步骤 12** 退出数据库 > postgres=# **\****q** EXPLAIN进行SQL优化实验结束。 # **4** 日志检查 ## 4.1 实验介绍 ### 4.1.1 关于本实验 数据库运行时,某些操作在执行过程中可能会出现错误,数据库依然能够运行。但是此时数据库中的数据可能已经发生不一致的情况。建议检查openGauss运行日志,及时发现隐患。 当openGauss发生故障时,使用 gs_collector 此工具收集OS信息、日志信息以及配置文件等信息,来定位问题。 本实验主要是先手工设置收集配置信息,然后通过gs_collector工具调整用配置来收集相关日志信息。 ### 4.1.2 实验目的 * 掌握gs_collector工具的基本使用; ## 4.2 通过gs_collector工具来收集日志信息 表4-1 **gs_collector内容收集对照表** | **TypeName** | **Content** | **描述** | | ------------ | ----------------------- | ------------------------------------------------------------ | | System | HardWareInfoRunTimeInfo | 收集现在操作系统的状态信息:HardWareInfoCpu(cat /proc/cpuinfo)内存(cat /proc/meminfo)磁盘(df -h)RunTimeInfo:topStatus(ps ux)ioStat(iostat -xm 2 3)网络状态(cat /proc/net/dev)内存使用情况(free -m) | | Database | 具体列表见表4-2 | 收集系统视图或者系统表的内容。 | | Log | DBnodeClusterManager | 收集DBnode的pg_log和gs_profile收集ClusterManager的日志信息包括:omgs_ctlgs_gucgs_initdb | | Config | DBnode | 收集DBnode的配置信息:postgresql.confgaussdb.statepg_hba.confpg_controlpg_replslotpg_ident.conf | | Gstack | DBnode | 利用gstack命令得到DBnode的当前堆栈信息。 | | CoreDump | gaussdbgs_ctl | 通过时间筛选gaussdb进程的core文件。注意:关于Core的配置和方式请按照如下要求:在/proc/sys/kernel/core_pattern文件中添加core文件的格式:/gauss/corefile/core-%e-%p-%t。 | | XLog | DBnode | 通过时间筛选收集xlog。 | | Plan | * | 收集计划复现信息:用户输入*表示收集所有数据库上的计划复现信息。用户输入具体的数据库名称表示收集指定数据库上的计划复现信息。 | 表4-2 **gs_collector工具支持收集的系统表和视图列表** | **Class** | **View Name** | | --------------------------------- | ------------------------ | | OS | gs_os_run_info | | pg_os_threads | | | Session/Thread | gs_session_stat | | gs_session_time | | | gs_session_cpu_statistics | | | gs_session_memory_statistics | | | gs_session_memory_context | | | gs_session_memory | | | gs_session_memory_detail | | | pg_stat_activity | | | gs_thread_memory_context | | | WLM | gs_cluster_resource_info | | pg_total_user_resource_info | | | pg_total_user_resource_info_oid | | | gs_wlm_rebuild_user_resource_pool | | | gs_wlm_resource_pool | | | gs_wlm_workload_records | | | pg_wlm_statistics | | | pg_app_workloadgroup_mapping | | | Query-APOperator | gs_wlm_operator_info | | gs_wlm_operator_history | | | gs_wlm_operator_statistics | | | Query-AP | gs_wlm_session_info_all | | gs_wlm_session_history | | | gs_wlm_session_info | | | gs_wlm_user_session_info | | | gs_wlm_session_statistics | | | pg_session_iostat | | | pg_session_wlmstat | | | Cache I/O | pg_statio_all_indexes | | pg_statio_all_sequences | | | pg_statio_all_tables | | | pg_statio_sys_indexes | | | pg_statio_sys_sequences | | | pg_statio_sys_tables | | | pg_statio_user_indexes | | | pg_statio_user_sequences | | | pg_statio_user_tables | | | gs_stat_db_cu | | | gs_stat_session_cu | | | Memory | pg_total_memory_detail | | pg_shared_memory_detail | | | gs_total_memory_detail | | | File | gs_file_stat | | gs_redo_stat | | | pg_stat_bad_block | | | Object | pg_stat_user_tables | | pg_stat_user_indexes | | | pg_stat_sys_tables | | | pg_stat_sys_indexes | | | pg_stat_all_tables | | | pg_stat_all_indexes | | | pg_stat_database | | | pg_stat_database_conflicts | | | pg_stat_xact_all_tables | | | pg_stat_xact_sys_tables | | | pg_stat_xact_user_tables | | | pg_stat_xact_user_functions | | | Lock | pg_locks | | Utility | pg_stat_replication | | pg_replication_slots | | | pg_stat_bgwriter | | | Transaction | pg_running_xacts | | pg_prepared_xacts | | | Waits | pg_thread_wait_status | **步骤 1** 设置收集配置文件。 > [omm@ecs-e1b3 ~]$ **pwd** > > /home/omm > > [omm@ecs-e1b3 ~]$ **vi collector.json** 在用vi collector.json创建配置文件后,输入”i”进入INSERT模式,并将以下文本内容添加至配置文件中,具体如下: > { > > "Collect": > > [ > {"TypeName": "System", "Content":"RunTimeInfo, HardWareInfo","Interval":"0", "Count":"1"}, > > {"TypeName": "Log", "Content" : "Coordinator,DataNode,Gtm,ClusterManager", "Interval":"0", "Count":"1"}, > > {"TypeName": "Database", "Content": "pg_locks,pg_stat_activity,pg_thread_wait_status","Interval":"0", "Count":"1"}, > {"TypeName": "Config", "Content": "Coordinator,DataNode,Gtm", "Interval":"0", "Count":"1"} > > ] > > } 内容添加好后,按下“Esc”键,然后输入“:wq”进行保存文件退出。 配置文件中 利用TypeName指定需要收集的信息类型; 利用Content指定每一类信息的具体内容; 利用Count指定此类信息收集的次数; 利用Interval指定收集间隔,单位为秒; TypeName和Content不允许缺失或者内容为空; Interval和Count可以不指定,如果没有指定Count,则默认收集一次; 如果没有指定Interval则表示间隔为0秒,Interval和Count的值不能小于0; 如果不指定则使用默认的配置文件; 可以根据gs_collector内容收集对照表进行个性化定制配置; 配置文件格式采用json格式。 **步骤 2** 确定数据库服务是否启动。 > [omm@ecs-e1b3 ~]$ **gs_om -t status;** > > \----------------------------------------------------------------------- > > cluster_state : Unavailable > > redistributing : No > > \----------------------------------------------------------------------- cluster_state : Normal 表示已启动,可以正常使用。如果状态为Unavailable表示不可用 为了实验继续进行,请先启动数据库服务。 启动数据库服务(如果数据库服务是正常状态,此步骤可以不执行)。 > [omm@ecs-e1b3 ~]$ **gs_om -t start;** > > Starting cluster. > > ========================================= > > ========================================= > > Successfully started. **步骤 3 **收集OS信息及日志信息。 begin-time、end-time的值根据自己实际想收集的时间来设置。 > [omm@ecs-e1b3 ~]$ **gs_collector --begin-time="20200720 23:00" --end-time="20200729 20:00" -C /home/omm/collector.json** > > Successfully parsed the configuration file. > > create Dir. > > Successfully create dir. > > do system check interval 0 : count 1 > > Collecting OS information. > > Failed to collect OS information. > > do database check interval 0 : count 1 > > Collecting catalog statistics. > > Successfully collected catalog statistics. > > do log check interval 0 : count 1 > > Collecting Log files. > > Successfully collected Log files. > > do Config check 0:1 > > Collecting Config files. > > Successfully collected Config files. > > Collecting files. > > Successfully collected files. > > **All results are stored in /opt/huawei/wisequery/omm_mppdb/collector_20200727_094932.tar.gz.** 收集完后,所有的结果存放在/opt/huawei/wisequery/omm_mppdb/collector_20200727_094932.tar.gz包中,请注意自己生成的文件包名称,因为**每次的文件包名不一样**。 **步骤 4** 查看日志信息。 先进入日志包所在的目录,然后将日志包进行解压。 > [omm@ecs-e1b3 omm_mppdb]$ **cd /opt/huawei/wisequery/omm_mppdb/** > > [omm@ecs-e1b3 omm_mppdb]$ **ll** > > total 48K > > -rw------- 1 omm dbgrp 46K Jul 27 09:49 collector_20200727_094932.tar.gz > > [omm@ecs-e1b3 omm_mppdb]$ **tar -zxvf collector_20200727_094932.tar.gz** > > collector_20200727_094932/ > > collector_20200727_094932/ecs-e1b3.tar.gz > > collector_20200727_094932/Summary.log > > collector_20200727_094932/Detail.log 接下来,进入解压后的文件夹collector_20200727_094932,并对ecs-e1b3.tar.gz包进一步解压。 > [omm@ecs-e1b3 omm_mppdb]$ **cd collector_20200727_094932** > > [omm@ecs-e1b3 collector_20200727_094932]$ **ll** > > total 24K > > -rw-------. 1 omm dbgrp 16K Feb 7 15:16 db1.tar.gz > > -rw-------. 1 omm dbgrp 2.7K Feb 7 15:16 Detail.log > > -rw-------. 1 omm dbgrp 1.1K Feb 7 15:16 Summary.log > > [omm@ecs-e1b3 collector_20200727_094932]$ **tar -zxvf db1.tar.gz** > > ecs-e1b3/ > > ecs-e1b3/logfiles/ > > ecs-e1b3/logfiles/log_20200727_094935975042.tar.gz > > ecs-e1b3/planSimulatorfiles/ > > ecs-e1b3/catalogfiles/ > > ecs-e1b3/catalogfiles/dn_6001_pg_thread_wait_status_20200727_094935303146.csv > > ecs-e1b3/catalogfiles/gs_clean_20200727_094935470508.txt > > ………………………… > > ecs-e1b3/systemfiles/ > > ecs-e1b3/systemfiles/OS_information_20200727_094933424734.txt > > ecs-e1b3/systemfiles/database_system_info_20200727_094933446671.txt > > [omm@ecs-e1b3 collector_20200727_094932]$ 在解压的**db1****(指的是服务器名,各自的不一样,请注意观察)**下有各种定制收集的日志类型目录如下: > [omm@ecs-e1b3 collector_20200727_094932]$ **cd db1** > > [omm@ecs-e1b3 ecs-e1b3]$ **ll** > > total 32K > > drwx------ 2 omm dbgrp 4.0K Jul 27 09:49 catalogfiles > > drwx------ 2 omm dbgrp 4.0K Jul 27 09:49 configfiles > > drwx------ 2 omm dbgrp 4.0K Jul 27 09:49 coreDumpfiles > > drwx------ 2 omm dbgrp 4.0K Jul 27 09:49 gstackfiles > > drwx------ 2 omm dbgrp 4.0K Jul 27 09:49 logfiles > > drwx------ 2 omm dbgrp 4.0K Jul 27 09:49 planSimulatorfiles > > drwx------ 2 omm dbgrp 4.0K Jul 27 09:49 systemfiles > > drwx------ 2 omm dbgrp 4.0K Jul 27 09:49 xlogfiles > > [omm@ecs-e1b3 ecs-e1b3]$ **cd catalogfiles/** > > [omm@ecs-e1b3 catalogfiles]$ **ll** > > total 16K > > -rw------- 1 omm dbgrp 389 Jul 27 09:49 dn_6001_pg_locks_20200727_094934961507.csv > > -rw------- 1 omm dbgrp 1.4K Jul 27 09:49 dn_6001_pg_stat_activity_20200727_094935134988.csv > > -rw------- 1 omm dbgrp 878 Jul 27 09:49 dn_6001_pg_thread_wait_status_20200727_094935303146.csv > > -rw------- 1 omm dbgrp 281 Jul 27 09:49 gs_clean_20200727_094935470508.txt **步骤 5** 下载收集后的日志文件。 根据自己需要比如可以通过WinSCP或者XFTP等SSH工具将日志文件下载至自己本地电脑。 使用root用户和密码登录数据库服务器(主机名为ecs的弹性公网IP):  点击**“打开目录/书签”**,输入目录路径“/opt/huawei/wisequery/omm_mppdb/”,点击确定后进入此目录: 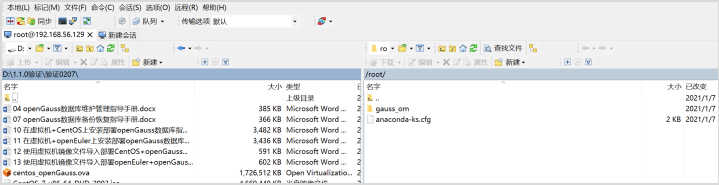 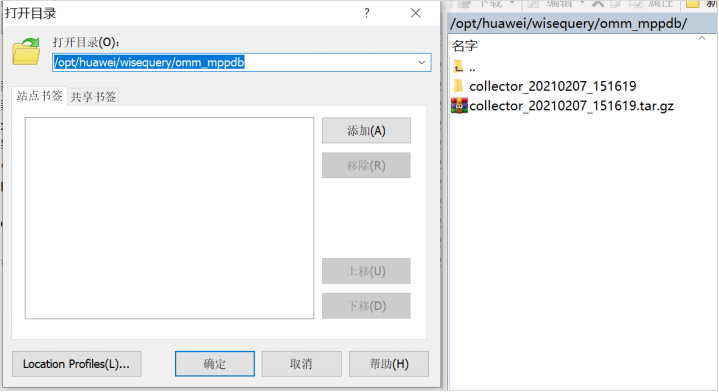 逐层查找到“catalogfiles”文件夹,点击选中文件夹,然后点击“下载”,下载到Windows对应文件夹下: 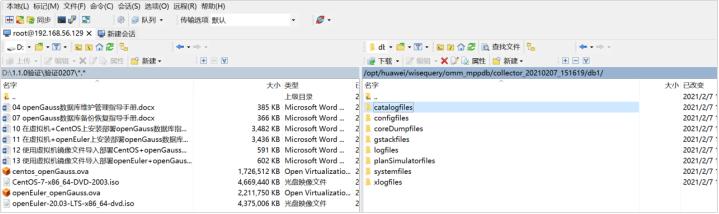 查看下载后的文件夹内容:  <center>图4-1 日志文件下载 # **5** 最大连接数设置 ## 5.1 实验介绍 ### 5.1.1 关于本实验 当应用程序与数据库的连接数超过最大值,则新的连接无法建立。建议对连接数进行监控,及时释放空闲的连接或者增加最大连接数。 本实验主要是讲如何来设置数据库最大连接个数。 ### 5.1.2 实验目的 * 掌握对数据库最大连接数的设置方法。 ## 5.2 场景设置及操作步骤 **步骤 1** 用ROOT用户登录装有openGauss数据库服务的操作系统然后用 su – omm命令切换至OMM用户环境,登录后信息如下。 > Welcome to 4.19.90-2003.4.0.0036.oe1.aarch64 > > System information as of time: Mon Jul 27 11:22:46 CST 2020 > > System load: 0.03 > > Processes: 154 > > Memory used: 2.3% > > Swap used: 0.0% > > Usage On: 14% > > IP address: 192.168.0.12 > > Users online: 3 > > [root@ecs-e1b3 ~]# **su - omm** > > Last login: Mon Jul 27 09:23:44 CST 2020 on pts/0 > > Welcome to 4.19.90-2003.4.0.0036.oe1.aarch64 > > System information as of time: Mon Jul 27 11:23:37 CST 2020 > > System load: 0.01 > > Processes: 156 > > Memory used: 2.4% > > Swap used: 0.0% > > Usage On: 14% > > IP address: 192.168.0.12 > > Users online: 3 **步骤 2** 确认openGauss数据库服务是否启动 > [omm@ecs-e1b3 ~]$ **gs_om -t status;** > > \----------------------------------------------------------------------- > > cluster_name : dbCluster > > cluster_state : Normal > > redistributing : No > > \----------------------------------------------------------------------- cluster_state : Normal 表示已启动,可以正常使用。如果状态为非Normal表示不可用 为了实验场景设置,如果数据库服务没有启动,请执行步gs_om -t start 命令启动服务。 **步骤 3** 登录数据库 使用gsql客户端以管理员用户身份连接postgres数据库,假设端口号为26000。 > [omm@ecs-e1b3 ~]$ **gsql -d postgres -p 26000 -r** > > gsql ((openGauss 1.1.0 build 38a9312a) compiled at 2020-05-27 14:57:08 commit 472 last mr 549 ) > > Non-SSL connection (SSL connection is recommended when requiring high-security) > > Type "help" for help. > > > > postgres=# **步骤 4** 查看当前数据库已使用的连接数 > postgres=# **select count(1) from pg_stat_activity;** > > count > > \------- > > 10 > > (1 row) 10表示当前有10个应用已连接到数据库 **步骤 5** 查看数据库设置的最大连接数 > postgres=# **SHOW max_connections;** > > max_connections > > \----------------- > > 5000 > > (1 row) 5000 表示数据库设置的最大连接个数为5000。如果当前数据库已使用的连接数快接近于最大连接数时,运维人员先要果断的增加最大连接数以防系统新的连接无法建立。 **步骤 6** 调整最大连接数参数 参数修改方式一: 先 **\q** 退出数据库,然后在omm 用户环境下通过gs_guc工具来增大参数值,如下: > [omm@ecs-e1b3 ~]$ **gs_guc reload -I all -c "max_connections= 6000";** > > expected instance path: [/gaussdb/data/db1/postgresql.conf] > > gs_guc reload: max_connections=6000: [/gaussdb/data/db1/postgresql.conf] > > server signaled > > Total instances: 1. Failed instances: 0. > > Success to perform gs_guc! 参数修改方式二: 也可以用alter system set 语句来设置此参数,如下: > [omm@ecs-e1b3 ~]$ **gsql -d postgres -p 26000 -r** > > gsql ((openGauss 1.1.0 build 38a9312a) compiled at 2020-05-27 14:57:08 commit 472 last mr 549 ) > > Non-SSL connection (SSL connection is recommended when requiring high-security) > > Type "help" for help. > > > > postgres=# **alter system set max_connections=6000;** > > NOTICE: please restart the database for the POSTMASTER level parameter to take effect. > > ALTER SYSTEM SET > > postgres=#**\****q** **步骤 7** 重启数据库 gs_om -t stop先关闭数据库,然后用gs_om -t start再启动数据库 > [omm@ecs-e1b3 ~]$ **gs_om -t stop;** > > Stopping cluster. > > ========================================= > > Successfully stopped cluster. > > ========================================= > > End stop cluster. > > [omm@ecs-e1b3 ~]$ **gs_om -t start;** > > Starting cluster. > > ========================================= > > ========================================= > > Successfully started. **步骤 8** 验证参数设置是否成功 使用gsql客户端以管理员用户身份连接postgres数据库,然后查看参数值。 > [omm@ecs-e1b3 ~]$ **gsql -d postgres -p 26000 -r** > > gsql ((openGauss 1.1.0 build 38a9312a) compiled at 2020-05-27 14:57:08 commit 472 last mr 549 ) > > Non-SSL connection (SSL connection is recommended when requiring high-security) > > Type "help" for help. > > > > postgres=# **SHOW max_connections;** > > max_connections > > \----------------- > > 6000 > > (1 row) 这里显示max_connections 为 6000,说明前面参数的修改已经生效。 **步骤 9** 退出数据库 > postgres=#**\****q** 最大连接数设置实验结束。 # **6** 例行表、索引的维护 ## 6.1 实验介绍 ### 6.1.1 关于本实验 为了保证数据库的有效运行,数据库必须在插入/删除操作后,基于客户场景,定期做VACUUM FULL和ANALYZE,更新统计信息,以便获得更优的性能; * VACUUM FULL可回收已更新或已删除的数据所占据的磁盘空间,同时将小数据文件合并; * VACUUM对每个表维护了一个可视化映射来跟踪包含对别的活动事务可见的数组的页。一个普通的索引扫描首先通过可视化映射来获取对应的数组,来检查是否对当前事务可见。若无法获取,再通过堆数组抓取的方式来检查。因此更新表的可视化映射,可加速唯一索引扫描; * ANALYZE可收集与数据库中表内容相关的统计信息。统计结果存储在系统表PG_STATISTIC中。查询优化器会使用这些统计数据,生成最有效的执行计划。 * 数据库经过多次删除操作后,索引页面上的索引键将被删除,造成索引膨胀。例行重建索引,可有效的提高查询效率。 本实验主要是通过使用VACUUM、VACUUM FULL FULL来收缩表,用ANALYZE来收集表的统计信息以及对表上的索引进行重建。 ### 6.1.2 实验目的 * 掌握VACUUM、VACUUM FULL FULL、ANALYZE基本的使用及如何重建索引; ## 6.2 场景设置及操作步骤 * 步骤 1 用ROOT用户登录装有openGauss数据库服务的操作系统然后用 su – omm命令切换至OMM用户环境,登录后信息如下。 > Welcome to 4.19.90-2003.4.0.0036.oe1.aarch64 > > System information as of time: Tue Jul 27 16:21:11 CST 2020 > > System load: 0.01 > > Processes: 109 > > Memory used: 6.7% > > Swap used: 0.0% > > Usage On: 15% > > IP address: 192.168.0.96 > > Users online: 1 > > [root@ecs-e1b3 ~]# **su - omm** > > Last login: Fri Jul 27 16:22:11 CST 2020 on pts/0 > > Welcome to 4.19.90-2003.4.0.0036.oe1.aarch64 > > System information as of time: Tue Jul 27 16:21:11 CST 2020 > > System load: 0.01 > > Processes: 111 > > Memory used: 7.0% > > Swap used: 0.0% > > Usage On: 15% > > IP address: 192.168.0.96 > > Users online: 1 > > [omm@ecs-e1b3 ~]$ > 步骤 2 启动服务器后,然后使用gsql客户端以管理员用户身份连接postgres数据库,假设端口号为26000。 启动数据库服务。 > [omm@ecs-e1b3 ~]$ **gs_om -t start;** > > Starting cluster. > > ========================================= > > ========================================= > > Successfully started. > > 连接postgres数据库。 > > [omm@ecs-e1b3 ~]$ **gsql -d postgres -p 26000 -r** > > gsql ((openGauss 1.1.0 build 38a9312a) compiled at 2020-05-27 14:56:08 commit 472 last mr 549 ) > > Non-SSL connection (SSL connection is recommended when requiring high-security) > > Type "help" for help. > > > > postgres=# **步骤 3** 创建student表 > postgres=# **drop table student;** > > postgres=# **CREATE TABLE student** > > **( std_id INT NOT NULL,** > > **std_name VARCHAR(20) NOT NULL,** > > **std_sex VARCHAR(6),** > > **std_birth DATE,** > > **std_in DATE NOT NULL,** > > **std_address VARCHAR(100)** > > **);** > > > > CREATE TABLE **步骤 4** 表数据插入 > INSERT INTO student(std_id,std_name,std_sex,std_birth,std_in,std_address) VALUES (1,'张一','男','1993-01-01','2011-09-01','江苏省南京市雨花台区'); > > INSERT INTO student(std_id,std_name,std_sex,std_birth,std_in,std_address) VALUES (2,'张二','男','1993-01-02','2011-09-01','江苏省南京市雨花台区'); > > INSERT INTO student(std_id,std_name,std_sex,std_birth,std_in,std_address) VALUES (3,'张三','男','1993-01-03','2011-09-01','江苏省南京市雨花台区'); > > INSERT INTO student(std_id,std_name,std_sex,std_birth,std_in,std_address) VALUES (4,'张四','男','1993-01-04','2011-09-01','江苏省南京市雨花台区'); > > INSERT INTO student(std_id,std_name,std_sex,std_birth,std_in,std_address) VALUES (5,'张五','男','1993-01-05','2011-09-01','江苏省南京市雨花台区'); > > INSERT INTO student(std_id,std_name,std_sex,std_birth,std_in,std_address) VALUES (6,'张六','男','1993-01-06','2011-09-01','江苏省南京市雨花台区'); > > INSERT INTO student(std_id,std_name,std_sex,std_birth,std_in,std_address) VALUES (7,'张七','男','1993-01-07','2011-09-01','江苏省南京市雨花台区'); > > INSERT INTO student(std_id,std_name,std_sex,std_birth,std_in,std_address) VALUES (8,'张八','男','1993-01-08','2011-09-01','江苏省南京市雨花台区'); > > INSERT INTO student(std_id,std_name,std_sex,std_birth,std_in,std_address) VALUES (9,'张九','男','1993-01-09','2011-09-01','江苏省南京市雨花台区'); > > INSERT INTO student(std_id,std_name,std_sex,std_birth,std_in,std_address) VALUES (10,'李一','男','1993-01-10','2011-09-01','江苏省南京市雨花台区'); > > INSERT INTO student(std_id,std_name,std_sex,std_birth,std_in,std_address) VALUES (11,'李二','男','1993-01-11','2011-09-01','江苏省南京市雨花台区'); > > INSERT INTO student(std_id,std_name,std_sex,std_birth,std_in,std_address) VALUES (12,'李三','男','1993-01-12','2011-09-01','江苏省南京市雨花台区'); > > INSERT INTO student(std_id,std_name,std_sex,std_birth,std_in,std_address) VALUES (13,'李四','男','1993-01-13','2011-09-01','江苏省南京市雨花台区'); > > INSERT INTO student(std_id,std_name,std_sex,std_birth,std_in,std_address) VALUES (14,'李五','男','1993-01-14','2011-09-01','江苏省南京市雨花台区'); > > INSERT INTO student(std_id,std_name,std_sex,std_birth,std_in,std_address) VALUES (15,'李六','男','1993-01-15','2011-09-01','江苏省南京市雨花台区'); > > INSERT INTO student(std_id,std_name,std_sex,std_birth,std_in,std_address) VALUES (16,'李七','男','1993-01-16','2011-09-01','江苏省南京市雨花台区'); > > INSERT INTO student(std_id,std_name,std_sex,std_birth,std_in,std_address) VALUES (17,'李八','男','1993-01-17','2011-09-01','江苏省南京市雨花台区'); > > INSERT INTO student(std_id,std_name,std_sex,std_birth,std_in,std_address) VALUES (18,'李九','男','1993-01-18','2011-09-01','江苏省南京市雨花台区'); > > INSERT INTO student(std_id,std_name,std_sex,std_birth,std_in,std_address) VALUES (19,'王一','男','1993-01-19','2011-09-01','江苏省南京市雨花台区'); > > INSERT INTO student(std_id,std_name,std_sex,std_birth,std_in,std_address) VALUES (20,'王二','男','1993-01-20','2011-09-01','江苏省南京市雨花台区'); > > INSERT INTO student(std_id,std_name,std_sex,std_birth,std_in,std_address) VALUES (21,'王三','男','1993-01-21','2011-09-01','江苏省南京市雨花台区'); > > INSERT INTO student(std_id,std_name,std_sex,std_birth,std_in,std_address) VALUES (22,'王四','男','1993-01-22','2011-09-01','江苏省南京市雨花台区'); > > INSERT INTO student(std_id,std_name,std_sex,std_birth,std_in,std_address) VALUES (23,'王五','男','1993-01-23','2011-09-01','江苏省南京市雨花台区'); > > INSERT INTO student(std_id,std_name,std_sex,std_birth,std_in,std_address) VALUES (24,'王六','男','1993-01-24','2011-09-01','江苏省南京市雨花台区'); > > INSERT INTO student(std_id,std_name,std_sex,std_birth,std_in,std_address) VALUES (25,'王七','男','1993-01-25','2011-09-01','江苏省南京市雨花台区'); > > INSERT INTO student(std_id,std_name,std_sex,std_birth,std_in,std_address) VALUES (26,'王八','男','1993-01-26','2011-09-01','江苏省南京市雨花台区'); > > INSERT INTO student(std_id,std_name,std_sex,std_birth,std_in,std_address) VALUES (27,'王九','男','1993-01-27','2011-09-01','江苏省南京市雨花台区'); > > INSERT INTO student(std_id,std_name,std_sex,std_birth,std_in,std_address) VALUES (28,'钱一','男','1993-01-28','2011-09-01','江苏省南京市雨花台区'); > > INSERT INTO student(std_id,std_name,std_sex,std_birth,std_in,std_address) VALUES (29,'钱二','男','1993-01-29','2011-09-01','江苏省南京市雨花台区'); > > INSERT INTO student(std_id,std_name,std_sex,std_birth,std_in,std_address) VALUES (30,'钱三','男','1993-01-30','2011-09-01','江苏省南京市雨花台区'); > > INSERT INTO student(std_id,std_name,std_sex,std_birth,std_in,std_address) VALUES (31,'钱四','男','1993-02-01','2011-09-01','江苏省南京市雨花台区'); > > INSERT INTO student(std_id,std_name,std_sex,std_birth,std_in,std_address) VALUES (32,'钱五','男','1993-02-02','2011-09-01','江苏省南京市雨花台区'); > > INSERT INTO student(std_id,std_name,std_sex,std_birth,std_in,std_address) VALUES (33,'钱六','男','1993-02-03','2011-09-01','江苏省南京市雨花台区'); > > INSERT INTO student(std_id,std_name,std_sex,std_birth,std_in,std_address) VALUES (34,'钱七','男','1993-02-04','2011-09-01','江苏省南京市雨花台区'); > > INSERT INTO student(std_id,std_name,std_sex,std_birth,std_in,std_address) VALUES (35,'钱八','男','1993-02-05','2011-09-01','江苏省南京市雨花台区'); > > INSERT INTO student(std_id,std_name,std_sex,std_birth,std_in,std_address) VALUES (36,'钱九','男','1993-02-06','2011-09-01','江苏省南京市雨花台区'); > > INSERT INTO student(std_id,std_name,std_sex,std_birth,std_in,std_address) VALUES (37,'吴一','男','1993-02-07','2011-09-01','江苏省南京市雨花台区'); > > INSERT INTO student(std_id,std_name,std_sex,std_birth,std_in,std_address) VALUES (38,'吴二','男','1993-02-08','2011-09-01','江苏省南京市雨花台区'); > > INSERT INTO student(std_id,std_name,std_sex,std_birth,std_in,std_address) VALUES (39,'吴三','男','1993-02-09','2011-09-01','江苏省南京市雨花台区'); > > INSERT INTO student(std_id,std_name,std_sex,std_birth,std_in,std_address) VALUES (40,'吴四','男','1993-02-10','2011-09-01','江苏省南京市雨花台区'); > > INSERT INTO student(std_id,std_name,std_sex,std_birth,std_in,std_address) VALUES (41,'吴五','男','1993-02-11','2011-09-01','江苏省南京市雨花台区'); > > INSERT INTO student(std_id,std_name,std_sex,std_birth,std_in,std_address) VALUES (42,'吴六','男','1993-02-12','2011-09-01','江苏省南京市雨花台区'); > > INSERT INTO student(std_id,std_name,std_sex,std_birth,std_in,std_address) VALUES (43,'吴七','男','1993-02-13','2011-09-01','江苏省南京市雨花台区'); > > INSERT INTO student(std_id,std_name,std_sex,std_birth,std_in,std_address) VALUES (44,'吴八','男','1993-02-14','2011-09-01','江苏省南京市雨花台区'); > > INSERT INTO student(std_id,std_name,std_sex,std_birth,std_in,std_address) VALUES (45,'吴九','男','1993-02-15','2011-09-01','江苏省南京市雨花台区'); > > INSERT INTO student(std_id,std_name,std_sex,std_birth,std_in,std_address) VALUES (46,'柳一','男','1993-02-16','2011-09-01','江苏省南京市雨花台区'); > > INSERT INTO student(std_id,std_name,std_sex,std_birth,std_in,std_address) VALUES (47,'柳二','男','1993-02-17','2011-09-01','江苏省南京市雨花台区'); > > INSERT INTO student(std_id,std_name,std_sex,std_birth,std_in,std_address) VALUES (48,'柳三','男','1993-02-18','2011-09-01','江苏省南京市雨花台区'); > > INSERT INTO student(std_id,std_name,std_sex,std_birth,std_in,std_address) VALUES (49,'柳四','男','1993-02-19','2011-09-01','江苏省南京市雨花台区'); > > INSERT INTO student(std_id,std_name,std_sex,std_birth,std_in,std_address) VALUES (50,'柳五','男','1993-02-20','2011-09-01','江苏省南京市雨花台区'); **步骤 5** 数据查询统计 > postgres=# **select count(\*) from student;** > > count > > \------- > > 50 > > (1 row) > > > > postgres=# **select \* from student order by std_id;** > > std_id | std_name | std_sex | std_birth | std_in | std_address > > --------+----------+---------+---------------------+---------------------+---------------------- > > 1 | 张一 | 男 | 1993-01-01 00:00:00 | 2011-09-01 00:00:00 | 江苏省南京市雨花台区 > > 2 | 张二 | 男 | 1993-01-02 00:00:00 | 2011-09-01 00:00:00 | 江苏省南京市雨花台区 > > 3 | 张三 | 男 | 1993-01-03 00:00:00 | 2011-09-01 00:00:00 | 江苏省南京市雨花台区 > > 4 | 张四 | 男 | 1993-01-04 00:00:00 | 2011-09-01 00:00:00 | 江苏省南京市雨花台区 > > 5 | 张五 | 男 | 1993-01-05 00:00:00 | 2011-09-01 00:00:00 | 江苏省南京市雨花台区 > > …………….. **步骤 6** 查看表信息 > postgres=# **\d student** > > Table "public.student" > > Column | Type | Modifiers > > -------------+--------------------------------+----------- > > std_id | integer | not null > > std_name | character varying(20) | not null > > std_sex | character varying(6) | > > std_birth | timestamp(0) without time zone | > > std_in | timestamp(0) without time zone | not null > > std_address | character varying(100) | **步骤 7 **使用VACUUM命令,进行磁盘空间回收 > postgres=# **vacuum student;** > > VACUUM **步骤 8** 删除表中数据 > postgres=# **delete from student where std_id>30;** > > DELETE 20 **步骤 9** 使用VACUUM FULL命令,进行磁盘空间回收 > postgres=# **vacuum full student;** > > VACUUM **步骤 10** 使用ANALYZE语句更新统计信息 > postgres=# **analyze student;** > > ANALYZE **步骤 11** 使用ANALYZE VERBOSE语句更新统计信息,并输出表的相关信息 > postgres=# **analyze verbose student;** > > INFO: analyzing "public.student"(dn_6001 pid=37195) > > INFO: ANALYZE INFO : "student": scanned 1 of 1 pages, containing 30 live rows and 20 dead rows; 30 rows in sample, 30 estimated total rows(dn_6001 pid=37195) > > ANALYZE **步骤 12** 执行VACUUM ANALYZE命令进行查询优化 postgres=# **vacuum analyze student;** VACUUM **步骤 13** 查看特定表的统计信息 > postgres=# **select relname,n_tup_ins,n_tup_upd,n_tup_del,last_analyze,vacuum_count from PG_STAT_ALL_TABLES where relname='student';** > > relname | n_tup_ins | n_tup_upd | n_tup_del | last_analyze | vacuum_count > > ---------+-----------+-----------+-----------+------------------------------+-------------- > > student | 50 | 0 | 20 | 2020-07-27 17:07:19.17167+08 | 3 > > (1 row) > > postgres=# PG_STAT_ALL_TABLES视图将包含当前数据库中每个表的一行统计信息,以上查询结果中各列分别表示: Relname 表名 n_tup_ins 插入行数 n_tup_upd 更新行数 n_tup_del 删除行数 last_analyze 上次手动分析该表的时间 vacuum_count 这个表被手动清理的次数 **步骤 14** 索引维护 说明: * 如果数据发生大量删除后,索引页面上的索引键将被删除,导致索引页面数量的减少,造成索引膨胀。重建索引可回收浪费的空间。 * 新建的索引中逻辑结构相邻的页面,通常在物理结构中也是相邻的,所以一个新建的索引比更新了多次的索引访问速度要快。 * 重建索引有以下两种方式: * 使用REINDEX语句重建索引; * 先删除索引(DROP INDEX),再创建索引(CREATE INDEX)。 先在student表的std_name列上创建一个索引,如下: > postgres=# **create index inx_stu01 on student(std_name);** > > CREATE INDEX > > postgres=# 方式1:使用REINDEX语句重建索引,具体如下: > postgres=# **reindex table student;** > > REINDEX > > postgres=# 方式2:先删除索引(DROP INDEX),再创建索引(CREATE INDEX),具体如下: > postgres=# **drop index inx_stu01;** > > DROP INDEX > > postgres=# **create index inx_stu01 on student(std_name);** > > CREATE INDEX > > postgres=# 查看表结构信息,具体如下: > postgres=# **\d student;** > > Table "public.student" > > Column | Type | Modifiers > > -------------+--------------------------------+----------- > > std_id | integer | not null > > std_name | character varying(20) | not null > > std_sex | character varying(6) | > > std_birth | timestamp(0) without time zone | > > std_in | timestamp(0) without time zone | not null > > std_address | character varying(100) | > > Indexes: > > "inx_stu01" btree (std_name) TABLESPACE pg_default **步骤 15** 退出数据库 > postgres=#**\q** 例行表、索引的维护实验结束。 # **7** 附录一:Linux操作系统相关命令 Linux中的命令格式为:command [options] [arguments] 中括号表示可选的,即有些命令不需要选项也不需要参数,但有的命令在运行时需要多个选项或参数。 * options(选项):选项是调整命令执行行为的开关,选项的不同决定了命令的显示结果不同。 * agruments(参数):参数是指命令的作用对象。 ## 7.1 vi/vim 文本编辑器,若文件存在则是编辑,若不存在则是创建并编辑文本。 命令语法: vim [参数] 参数说明:可编辑的文件名。 命令示例: * 编辑名为clusterconfig的xml文本: vi clusterconfig.xml 注: vim编辑器有以下三种模式: * 正常模式:其它模式下按Esc或Ctrl+[进入,左下角显示文件名或为空。 * 插入模式:正常模式下按i键进入,左下角显示--INSERT--。 * 可视模式:正常模式下按v键进入,左下角显示--VISUAL--。 退出命令(正常模式下): * :wq 保存并退出。 * :q! 强制退出并忽略所有更改。 * :e! 放弃所有修改,并打开原有文件。 ## 7.2 cd 显示当前目录的名称,或切换当前的目录(打开指定目录)。 命令语法: cd [参数] 参数说明: * 无参数:切换用户当前目录。 * . :表示当前目录; * .. :表示上一级目录; * ~ :表示home目录; * / :表示根目录。 命令示例: * 切换到usr目录下的bin目录中: > cd /usr/bin * 切换到用户home目录: > cd * 切换到当前目录(cd后面接一个.): > cd . * 切换到当前目录上一级目录(cd后面接两个.): > cd .. * 切换到用户home目录: > cd ~ * 切换到根目录下: > cd / 注:切换目录需要理解绝对路径和相对路径这两个概念。 * 绝对路径:在Linux中,绝对路径是从/(即根目录)开始的,例如 /opt/software、/etc/profile, 如果目录以 / 就是绝对目录。 * 相对路径:是以 . 或 .. 开始的目录。 . 表示用户当前操作所在的位置,而 .. 表示上级目录。例如 ./gs_om 表示当前目录下的文件或者目录。 ## 7.3 mv 文件或目录改名(move (rename) files)或将文件或目录移入其它位置,经常用来备份文件或者目录。 命令语法: mv [选项] 参数1 参数2 常用选项: * -b:若需覆盖文件,则覆盖前先行备份。 参数说明: * 参数1:源文件或目录。 * 参数2:目标文件或目录。 命令示例: * 将文件python重命名为python.bak: > mv python python.bak * 将/physical/backup目录下的所有文件和目录移到/data/dbn1目录下: > mv /physical/backup/* /data/dbn1 ## 7.4 curl 在Linux中curl是一个利用URL规则在命令行下工作的文件传输工具。支持文件的上传和下载,是综合传输工具。 命令语法: curl [选项] [URL] 常用选项: * -A/--user-agent <string>:设置用户代理发送给服务器; * -C/--continue-at <offset>:断点续转; * -D/--dump-header <file>:把header信息写入到该文件中; * -e/--referer:来源网址; * -o/--output:把输出写到该文件中; * -O/--remote-name:把输出写到该文件中,保留远程文件的文件名; * -s/--silent:静默模式。不输出任何东西; * -T/--upload-file <file>:上传文件; * -u/--user <user[:password]>:设置服务器的用户和密码; * -x/--proxy <host[:port]>:在给定的端口上使用HTTP代理; * -#/--progress-bar:进度条显示当前的传送状态。 参数说明: * URL:指定的文件传输URL地址。 命令示例: * 将url(https://mirrors.huaweicloud.com/repository/conf/CentOS-7-anon.repo)的内容保存到/etc/yum.repos.d/CentOS-Base.repo文件中。 > curl -o /etc/yum.repos.d/CentOS-Base.repo https://mirrors.huaweicloud.com/repository/conf/CentOS-7-anon.repo * 如果在传输过程中掉线,可以使用-C的方式进行续传。 > curl -C -O https://mirrors.huaweicloud.com/repository/conf/CentOS-7-anon.repo ## 7.5 yum Shell 前端软件包管理器。基于 RPM 包管理,能够从指定的服务器自动下载 RPM 包并且安装,可以自动处理依赖性关系,并且一次安装所有依赖的软体包,无须繁琐地一次次下载和安装。 命令语法: yum [options] [command] [package ...] 常用选项: * -h:查看帮助; * -y:当安装过程提示选择全部为 "yes"; * -q:不显示安装的过程。 参数说明: * command:要进行的操作。 * package:安装的包名。 命令示例: * 列出所有可更新的软件清单命令: > yum check-update * 更新所有软件命令: > yum update * 列出所有可安裝的软件清单命令: > yum list * 安装指定的软件: > yum install -y libaio-devel flex bison ncurses-devel glibc.devel patch lsb_release wget python3 ## 7.6 wget wget是Linux下下载文件的最常用命令。wget支持HTTP,HTTPS和FTP协议,支持自动下载,即可以在用户退出系统后在后台执行,直到下载结束。 命令语法: wget [选项] [URL] 常用选项: * -c:接着下载没下载完的文件; * -b:启动后转入后台执行; * -P:指定下载目录; * -O:变更下载文件名; * --ftp-user --ftp-password:使用FTP用户认证下载。 参数说明: * 指定的文件下载URL地址。 命令示例: * 下载openGauss数据库安装文件到当前文件夹: > wget https://opengauss.obs.cn-south-1.myhuaweicloud.com/1.0.0/x86/openGauss-1.0.0-CentOS-64bit.tar.gz * 使用wget断点续传: > wget –c https://opengauss.obs.cn-south-1.myhuaweicloud.com/1.0.0/x86/openGauss-1.0.0-CentOS-64bit.tar.gz ## 7.7 ln 为某一个文件在另外一个位置建立一个同步的链接(软硬链接,不带选项为硬链接)。 当需要在不同的目录,用到相同的文件时,就不需要在每一个需要要的目录下都放一个必须相同的文件,我们只要在某个固定的目录,放上该文件,然后在 其它的目录下用ln命令链接(link)它就可以,不必重复的占用磁盘空间。 命令语法: ln [选项] 参数1 参数2 常用选项: * -b --删除,覆盖以前建立的链接; * -d --允许超级用户制作目录的硬链接; * -s --软链接(符号链接)。 参数说明: * 参数1:源文件或目录。 * 参数2:被链接的文件或目录。 命令示例: * 为python3文件创建软链接/usr/bin/python,如果python3丢失,/usr/bin/python将失效: > ln -s python3 /usr/bin/python * 为python3创建硬链接/usr/bin/python,python3与/usr/bin/python的各项属性相同: > ln python3 /usr/bin/python ## 7.8 mkdir 创建指定的名称的目录,要求创建目录的用户在当前目录中具有写权限,并且指定的目录名不能是当前目录中已有的目录。 命令语法: mkdir [选项] [参数] 常用选项: * -p --可以是一个路径名称。此时若路径中的某些目录尚不存在,加上此选项后,系统将自动建立好那些尚不存在的目录,即一次可以建立多个目录(递归); * -v --每次创建新目录都显示信息; * -m --设定权限<模式> (类似chmod),而不是rwxrwxrwx减umask。 参数说明: * 需要创建的目录。 命令示例: * 创建一个空目录: > mkdir test * 递归创建多个目录: > mkdir -p /opt/software/openGauss * 创建权限为777的目录(目录的权限为rwxrwxrwx): mkdir –m 777 test ## 7.9 chmod命令 更改文件权限。 命令语法: chmod [选项] <mode> <file...> 常用选项: * -R, --以递归的方式对目前目录下的所有文件与子目录进行相同的权限变更。 参数说明: * mode:权限设定字串,详细格式如下 : [ugoa...][[+-=][rwxX]...][,...], 其中,[ugoa...]:u 表示该档案的拥有者,g 表示与该档案的拥有者属于同一个群体(group)者,o 表示其他以外的人,a 表示所有(包含上面三者);[+-=]:+ 表示增加权限,- 表示取消权限,= 表示唯一设定权限;[rwxX]:r 表示可读取,w 表示可写入,x 表示可执行,X表示只有当该档案是个子目录或者该档案已经被设定过为可执行。 * file:文件列表(单个或者多个文件、文件夹)。 命令示例: * 设置所有用户可读取文件 cluterconfig.xml: chmod ugo+r cluterconfig.xml 或 chmod a+r cluterconfig.xml * 设置当前目录下的所有档案与子目录皆设为任何人可读写: chmod -R a+rw * 数字权限使用格式: * 这种使用方式中,规定数字4、2和1表示读、写、执行权限,即r=4,w=2,x=1。 * 例:rwx = 7(4+2+1);rw = 6(4+2);r-x = 5 (4+0+1);r-- = 4(4+0+0);--x = 1(0+0+1); 每个文件都可以针对三个粒度,设置不同的rwx(读写执行)权限。即我们可以用用三个8进制数字分别表示 拥有者 、群组 、其它组( u、 g 、o)的权限详情,并用chmod直接加三个8进制数字的方式直接改变文件权限。语法格式为 : chmod <abc> file... 其中,a,b,c各为一个数字,分别代表User、Group、及Other的权限,相当于简化版的chmod u=权限,g=权限,o=权限 file...,而此处的权限将用8进制的数字来表示User、Group、及Other的读、写、执行权限。 命令示例: * 赋予cluterconfig.xml文件可读可写可执行权限(所有权限): chmod 777 cluterconfig.xml * 赋予/opt/software/openGauss目录下所有文件及其子目录 用户所有权限组可读可执行权限,其他用户可读可执行权限: chmod R 755 /opt/software/openGauss ## 7.10 chown 利用 chown 将指定文件的拥有者改为指定的用户或组,用户可以是用户名或者用户ID;组可以是组名或者组ID;文件是以空格分开的要改变权限的文件列表,支持通配符。只有系统管理者(root)才有这样的权限。使用权限 : **root**。 命令语法: chown [选项] user[:group] file... 常用选项: * -c : 显示更改的部分的信息; * -f : 忽略错误信息; * -R : 处理指定目录以及其子目录下的所有文件。 参数说明 * user : 新的文件拥有者的使用者 ID。 * group : 新的文件拥有者的使用者组(group)。 * flie:文件。 命令示例: * 将文件 file1.txt 的拥有者设为omm,群体的使用者dbgrp: > chown omm:dbgrp /opt/software/openGauss/clusterconfig.xml * 将目前目录下的所有文件与子目录的拥有者皆设为omm,群体的使用者dbgrp: > chown -R omm:dbgrp * ## 7.11 ls 列出文件和目录的内容。 命令语法: ls [选项] [参数] 常用选项: * -l --以长格式显示,列出文件的详细信息,如创建者,创建时间,文件的读写权限列表等等; * -a --列出文件下所有的文件,包括以"."和".."开头的隐藏文件 (Linux下文件隐藏文件是以 .开头的,如果存在 .. 代表存在着父目录); * -d --列出目录本身而非目录内的文件,通常要与-l一起使用; * -R --同时列出所有子目录层,与-l相似,只是不显示出文件的所有者,相当于编程中的“递归”实现; * -t --按照时间进行文件的排序,Time(时间); * -s --在每个文件的后面打印出文件的大小,size(大小); * -S --以文件的大小进行排序。 参数说明: * 目录或文件。 命令示例: * 以长格式列出当前目录中的文件及目录: > ls -l ## 7.12 cp 复制文件或者目录。 命令语法: cp [选项] 参数1 参数2 常用选项: * -f --如果目标文件无法打开则将其移除并重试(当 -n 选项存在时则不需再选此项); * -n --不要覆盖已存在的文件(使前面的 -i 选项失效); * -I --覆盖前询问(使前面的 -n 选项失效); * -p --保持指定的属性(默认:模式,所有权,时间戳),如果可能保持附加属性:环境、链接、xattr 等; * -R,-r --复制目录及目录内的所有项目。 参数说明: * 参数1:源文件。 * 参数2:目标文件。 命令示例: * 将home目录中的abc文件复制到opt目录下: > cp /home/abc /opt 注:目标文件存在时,会询问是否覆盖。这是因为cp是cp -i的别名。目标文件存在时,即使加了-f标志,也还会询问是否覆盖。 ## 7.13 rm 删除一个目录中的一个或多个文件或目录,它也可以将某个目录及其下的所有文件及子目录均删除。对于链接文件,只是删除了链接,原有文件均保持不变。 rm是一个危险的命令,使用的时候要特别当心,否则整个系统就会毁在这个命令(比如在/(根目录)下执行rm * rf)。所以,我们在执行rm之前最好先确认一下在哪个目录,到底要删除什么东西,操作时保持高度清醒的头脑。 命令语法: rm [选项] 文件 常用选项: * -f --忽略不存在的文件,从不给出提示; * -r --指示rm将参数中列出的全部目录和子目录均递归地删除。 参数说明: * 需要删除的文件或目录。 命令示例: * 删除文件: > rm qwe 注:输入rm qwe命令后,系统会询问是否删除,输入y后就会删除文件,不想删除文件则输入n。 * 强制删除某个文件: > rm-rf clusterconfig.log ## 7.14 cat 连接文件并在标准输出上输出。这个命令常用来显示文件内容,或者将几个文件连接起来显示,或者从标准输入读取内容并显示,它常与重定向符号配合使用。 命令语法: cat [选项] [参数] 常用选项: * -E --在每行结束显示$; * -n –由1开始对给所有输出行编号; * -b 或 --number-nonblank:和 -n 相似,只不过对于空白行不编号; * -v --使用 ^ 和 M- 符号,除了 LFD 和 TAB 之外。 参数说明: * 可操作的文件名。 命令示例: * 显示testfile文件的内容: > cat textfile * 把 textfile1 和 textfile2 的文档内容加上行号(空白行不加)之后将内容追加到 textfile3 文档里: > cat -b textfile1 textfile2 >> textfile3 * 向/etc/profile中追加内容(输入EOF表示结束追加): > cat >>/etc/profile<<EOF > > \>export LD_LIBRARY_PATH=$packagePath/script/gspylib/clib:$LD_LIBRARY_PATH > > \>EOF 注: * EOF是end of file的缩写,表示"文字流"(stream)的结尾。"文字流"可以是文件(file),也可以是标准输入(stdin)。在Linux系统之中,EOF是当系统读取到文件结尾,所返回的一个信号值(也就是-1)。 # **8** 附录二:openGauss数据库基本操作 ## 8.1 查看数据库对象 * 查看帮助信息: > postgres=# \? * 切换数据库: > *postgres*=# \c dbname * 列举数据库: 使用\l元命令查看数据库系统的数据库列表。 > postgres=# \l 使用如下命令通过系统表pg_database查询数据库列表。 > *postgres*=# SELECT datname FROM pg_database; * 列举表: > postgres=# \dt * 列举所有表、视图和索引: > postgres=# \d+ 使用gsql的\d+命令查询表的属性。 > *postgres*=# \d+ tablename * 查看表结构: > *postgres*=# \d tablename * 列举schema: > postgres=# \dn * 查看索引: > postgres=# \di * 查询表空间: 使用gsql程序的元命令查询表空间。 > postgres=# \db 检查pg_tablespace系统表。如下命令可查到系统和用户定义的全部表空间。 > *postgres*=# SELECT spcname FROM pg_tablespace; * 查看数据库用户列表: > *postgres*=# SELECT * FROM pg_user; * 要查看用户属性: > *postgres*=# SELECT * FROM pg_authid; * 查看所有角色: > *postgres*=# SELECT * FROM PG_ROLES; ## 8.2 其他操作 * 查看openGauss支持的所有SQL语句。 > postgres=#**\h** * 切换数据库: > *postgres*=# \c dbname * 切换用户: > *postgres*=# \c – username * 退出数据库: > postgres=# \q
上一篇:
05-Zookeeper客户端基础命令
下一篇:
06-Flume案例-实时监控整个目录的文件
文档导航

 浙ICP备案2024056857号
 浙公网安备33020502001085号