大数据学习
bigdata learning
Toggle navigation
大数据学习
主页
openGauss数据库
Flume
MongoDB
Hadoop
数据库实验
Kafka
Zookeeper
Hbase
Manual
Spark
Neo4j
InfluxDB
RabbitMQ
Flink
About Me
归档
标签
10-Flume案例-聚合
Flume
2022-09-27 17:21:09
38
0
0
bigdata
Flume
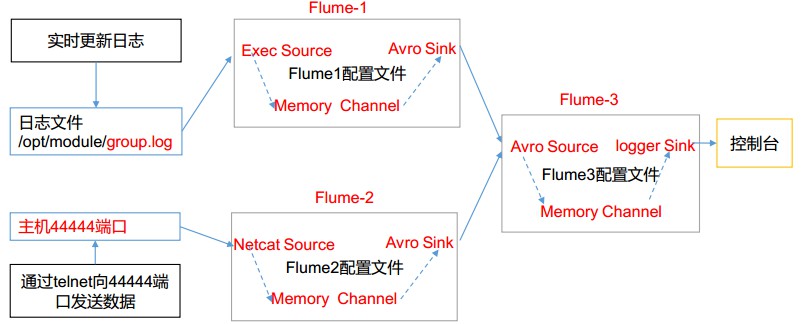
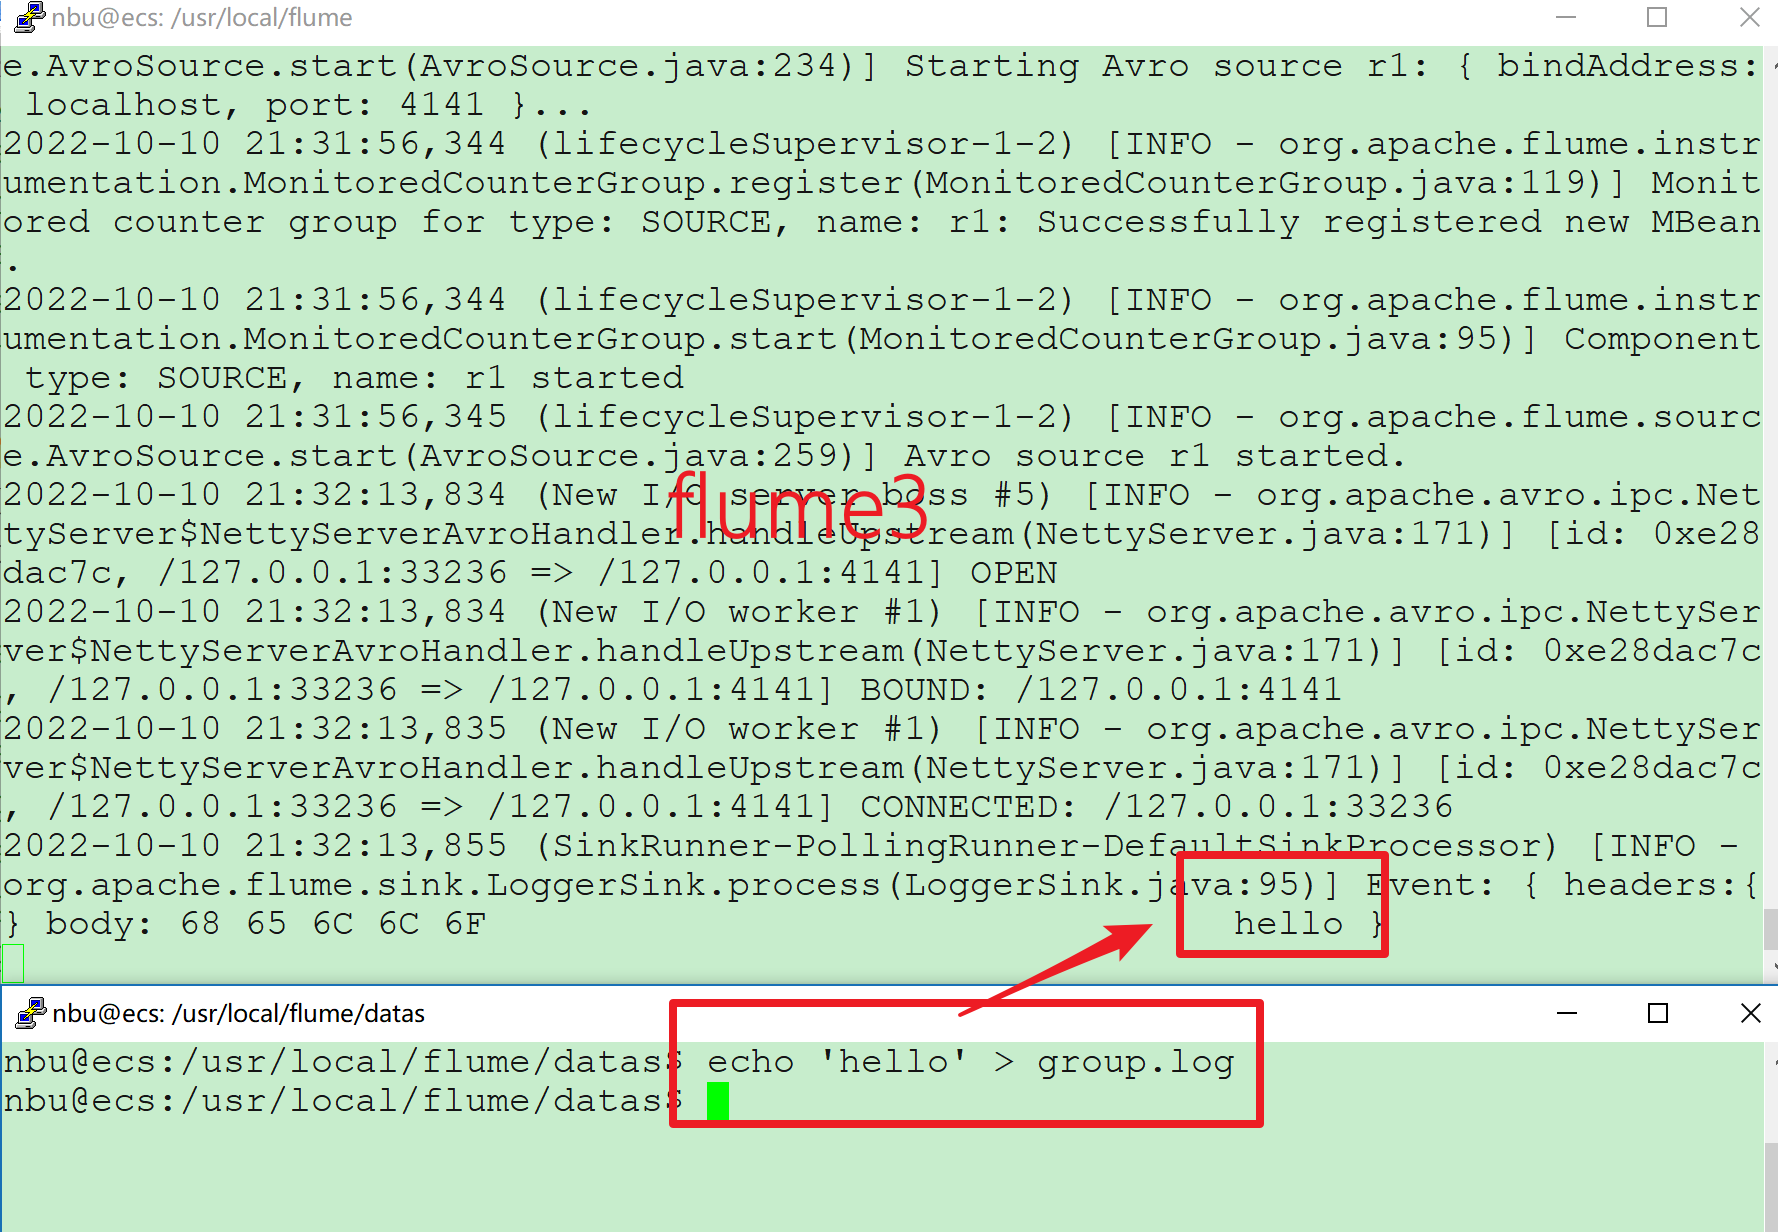
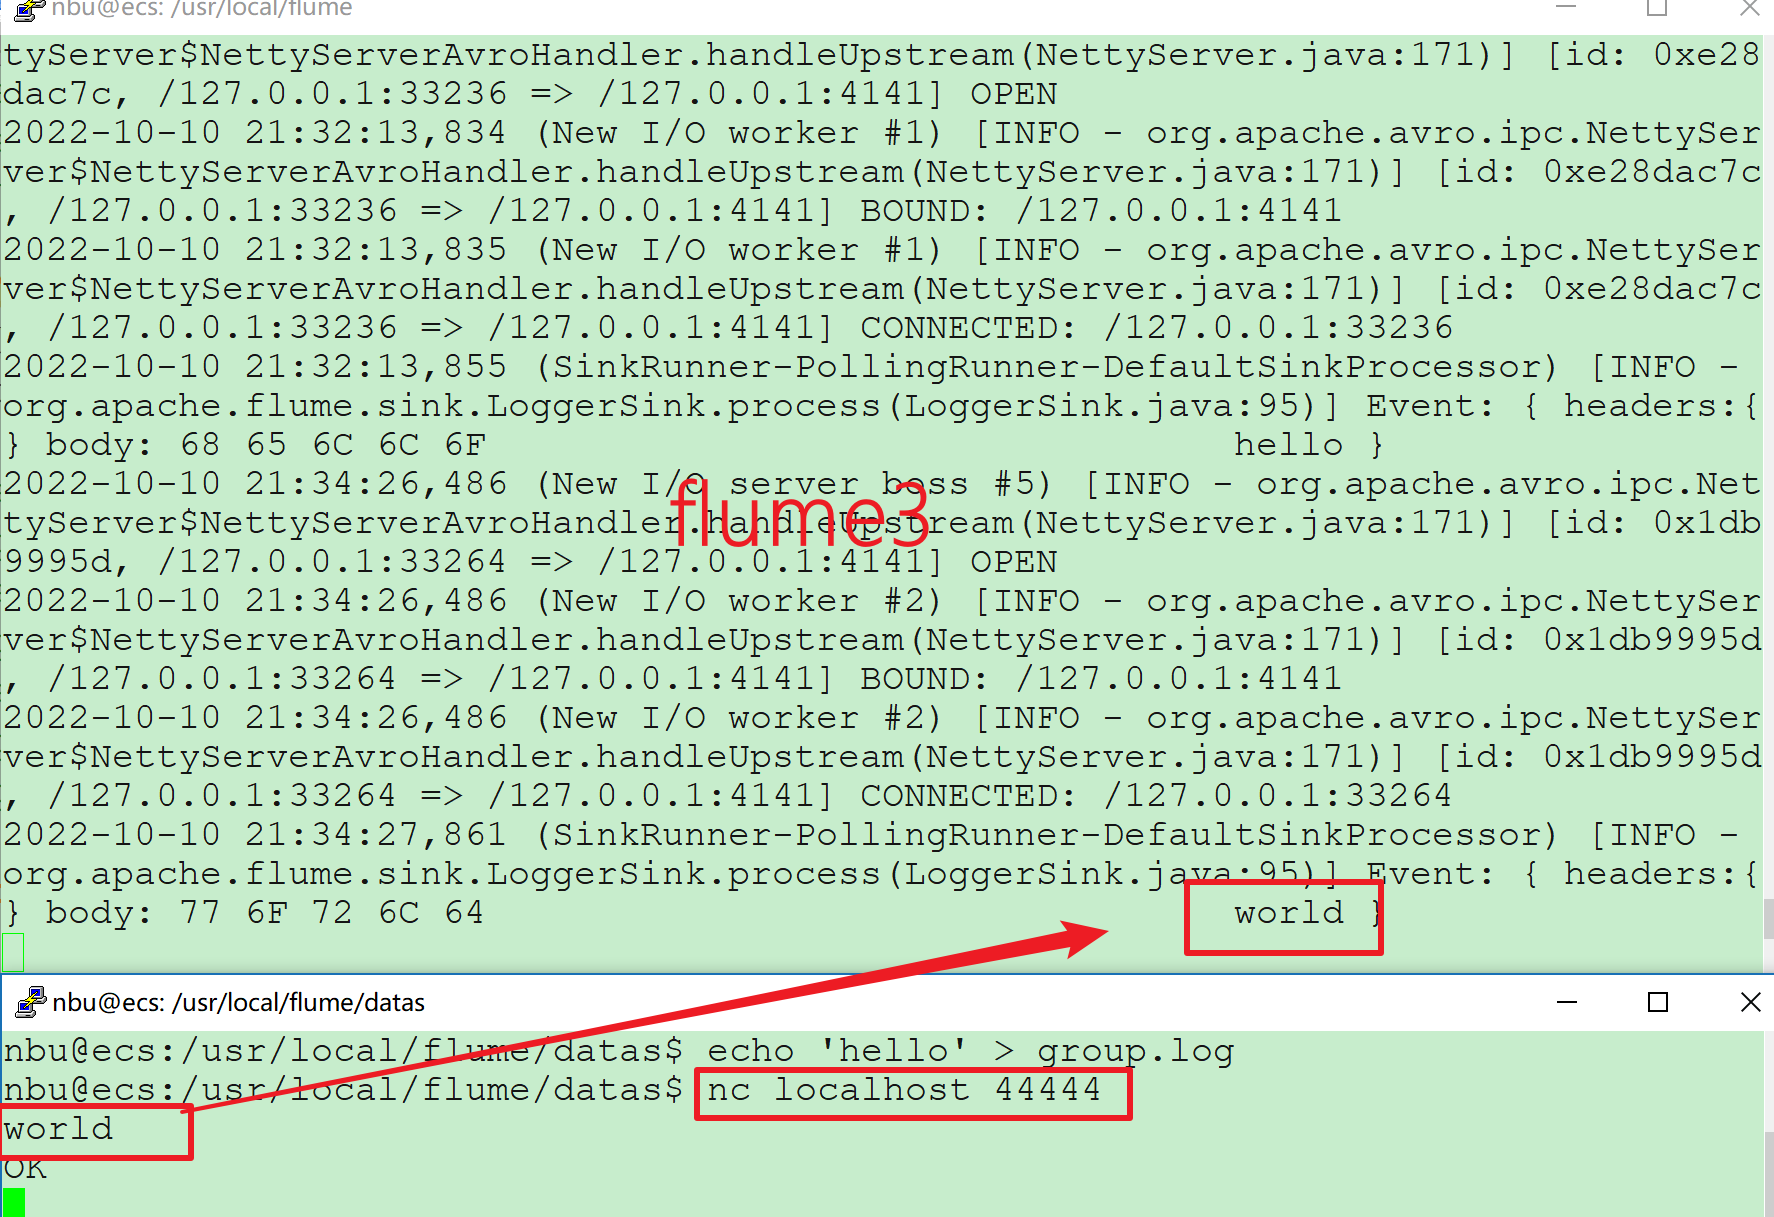
# Flume案例-聚合 ## 1)案例需求: Flume-1 监控文件/usr/local/flume/datas/group.log Flume-2 监控某一个端口的数据流,Flume-1 与 Flume-2 将数据发送给 Flume-3, Flume-3 将最终数据打印到控制台。 ## 2)需求分析:  ## 3)实现步骤: ### 1.准备工作 创建/usr/local/flume/datas/group.log: ```bash nbu@ecs:/usr/local/flume$ cd datas nbu@ecs:/usr/local/flume/datas$ touch group.log ``` 创建配置文件: ```bash nbu@ecs:~$ cd /usr/local/flume/job nbu@ecs:/usr/local/flume/job$ mkdir group3 nbu@ecs:/usr/local/flume/job$ cd group3 ``` ### 2.创建 flume1-logger-flume.conf 配置 Source 用于监控 hive.log 文件,配置 Sink 输出数据到下一级 Flume。 在 hadoop102 上编辑配置文件: ```bash /usr/local/flume/job/group3$ vim flume1-logger-flume.conf ``` 添加如下内容: ```bash # Name the components on this agent a1.sources = r1 a1.sinks = k1 a1.channels = c1 # Describe/configure the source a1.sources.r1.type = exec a1.sources.r1.command = tail -F /usr/local/flume/datas/group.log a1.sources.r1.shell = /bin/bash -c # Describe the sink a1.sinks.k1.type = avro a1.sinks.k1.hostname = localhost a1.sinks.k1.port = 4141 # Describe the channel a1.channels.c1.type = memory a1.channels.c1.capacity = 1000 a1.channels.c1.transactionCapacity = 100 # Bind the source and sink to the channel a1.sources.r1.channels = c1 a1.sinks.k1.channel = c1 ``` ### 3.创建 flume2-netcat-flume.conf 配置 Source 监控端口 44444 数据流,配置 Sink 数据到下一级 Flume: 在 hadoop103 上编辑配置文件: ```bash /usr/local/flume/job/group3$ vim flume2-netcat-flume.conf ``` 添加如下内容: ```bash # Name the components on this agent a2.sources = r1 a2.sinks = k1 a2.channels = c1 # Describe/configure the source a2.sources.r1.type = netcat a2.sources.r1.bind = localhost a2.sources.r1.port = 44444 # Describe the sink a2.sinks.k1.type = avro a2.sinks.k1.hostname = localhost a2.sinks.k1.port = 4141 # Use a channel which buffers events in memory a2.channels.c1.type = memory a2.channels.c1.capacity = 1000 a2.channels.c1.transactionCapacity = 100 # Bind the source and sink to the channel a2.sources.r1.channels = c1 a2.sinks.k1.channel = c1 ``` ### 4.创建 flume3-flume-logger.conf 配置 source 用于接收 flume1 与 flume2 发送过来的数据流,最终合并后 sink 到控制台。 在 hadoop104 上编辑配置文件: ```bash usr/local/flume/job/group3$ vim flume3-flume-logger.conf ``` 添加如下内容: ```bash # Name the components on this agent a3.sources = r1 a3.sinks = k1 a3.channels = c1 # Describe/configure the source a3.sources.r1.type = avro a3.sources.r1.bind = localhost a3.sources.r1.port = 4141 # Describe the sink # Describe the sink a3.sinks.k1.type = logger # Describe the channel a3.channels.c1.type = memory a3.channels.c1.capacity = 1000 a3.channels.c1.transactionCapacity = 100 # Bind the source and sink to the channel a3.sources.r1.channels = c1 a3.sinks.k1.channel = c1 ``` ### 5.执行配置文件 分别开启对应配置文件: flume3-flume-logger.conf, flume2-netcat-flume.conf, flume1-logger-flume.conf。 ```bash nbu@ecs:/usr/local/flume$ bin/flume-ng agent --conf conf/ --name a1 --conf-file job/group3/flume1-logger-flume.conf nbu@ecs:/usr/local/flume$ bin/flume-ng agent --conf conf/ --name a2 --conf-file job/group3/flume2-netcat-flume.conf nbu@ecs:/usr/local/flume$ bin/flume-ng agent --conf conf/ --name a3 --conf-file job/group3/flume3-flume-logger.conf -Dflume.root.logger=INFO,console ``` ### 6.向/usr/local/flume/datas 目录下的 group.log 追加内容: ```bash nbu@ecs:~$ cd /usr/local/flume/datas nbu@ecs:/usr/local/flume/datas$ echo 'hello' > group.log ``` 检查flume3中的结果  ### 7.向 44444 端口发送数据 ```bash nbu@ecs:/usr/local/flume/datas$ nc localhost 44444 ``` 检查flume3中的结果 
上一篇:
10 Linux和openGauss常用命令
下一篇:
10-MongoDB 正则表达式
文档导航